

Run a Section Verification List
Step 1: Log on
Step 1: Log on
Log into PeopleSoft. Then, use the Main Menu to navigate to “Section Verification.” (Your path will be “UA Custom Addons,” then “UASA Courses and Sections,” then “Process,” then “Section Verification”).
Step 2: Select a Run Control ID
Step 2: Select a Run Control ID
Please follow the correct set of instructions for your situation.
Run Control ID Instructions for First-time Users
If this is your first time running this process, you need to create a Run Control ID.
-
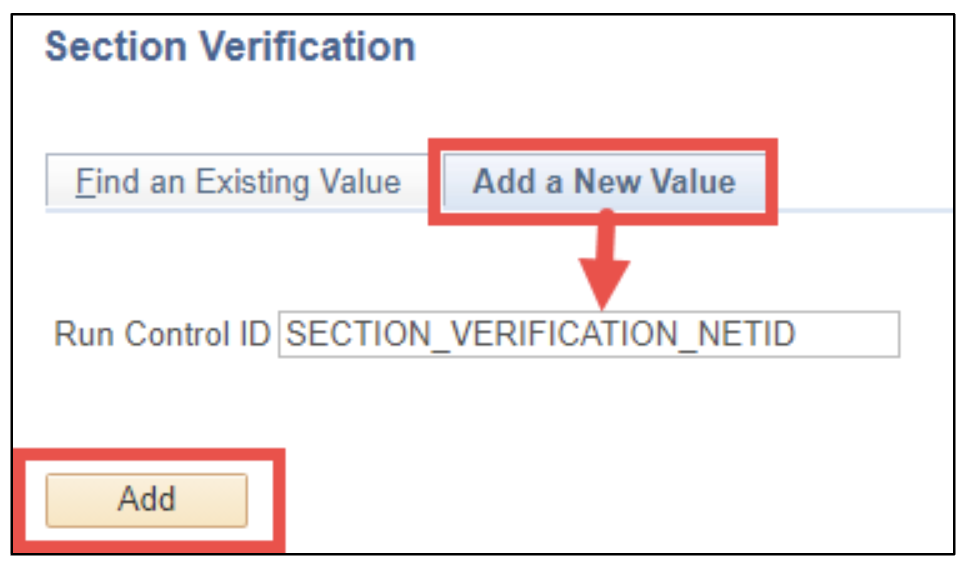
Select the “Add a New Value” tab.
-
Enter the Run Control: SECTION_VERIFICATION_Your NetID
(For example: SECTION_VERIFICATION_AB123456)
-
Select Add.
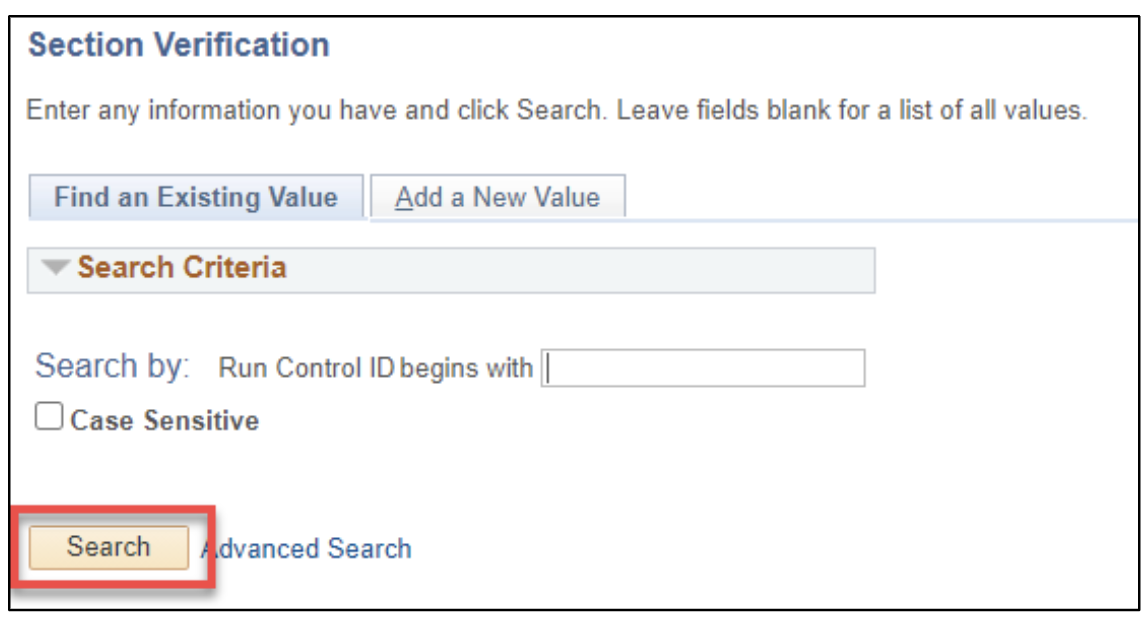
Run Control ID Instructions for Returning Users
-
Select “Search.” (If you receive the message, “No matching values were found,” follow the instructions in the “First-time Users” section above.)
-
Choose your Run Control ID from the Search Results.
(For example: SECTION_VERIFICATION_AB123456)
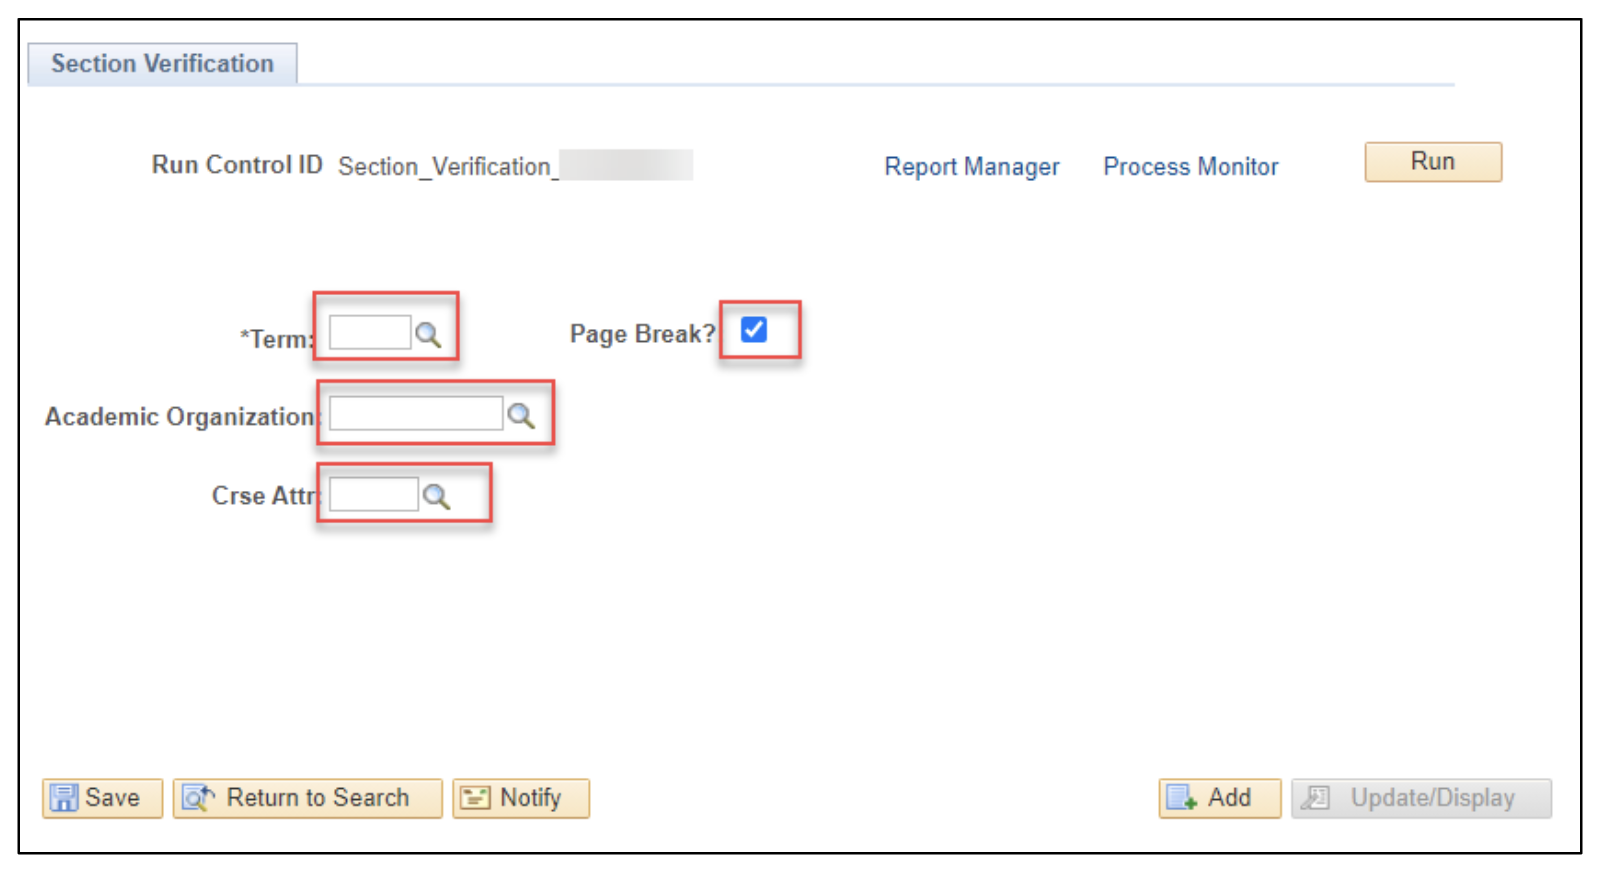
Step 3: Set Search Parameters
Step 3: Set Search Parameters
-
Enter the appropriate semester in the “Term” field. To look-up a term, click the magnifying glass next to the “Term” field and then select “Look Up.” Then click on the correct term.
-
Turn on the “Page Break” field by indicating a checkmark.
-
Enter the appropriate department pneumonic in the “Academic Organization” field (for example: AFRICANA for Africana Studies). To look up an academic organization, click the magnifying glass next to the “Academic Organization” field and select “Look Up.” Then, click on the correct academic organization.
You can also search by Course Attribute (Crse Attr). Examples include Educational Opportunities Program (EOP), Honors College (HONR) and Open Educational Resources (OER).
Note: If you are running a Section Verification List to see all classes scheduled within your Academic Organization do not select a Course Attribute. Course Attributes limit results to only return class sections that are tagged with the course attribute.
To look-up a course attribute, click the magnifying glass next to the “Crse Attr” field and select “Look Up.” Then, click on the correct attribute.
You can run a SVL for course attributes without selecting an academic organization.
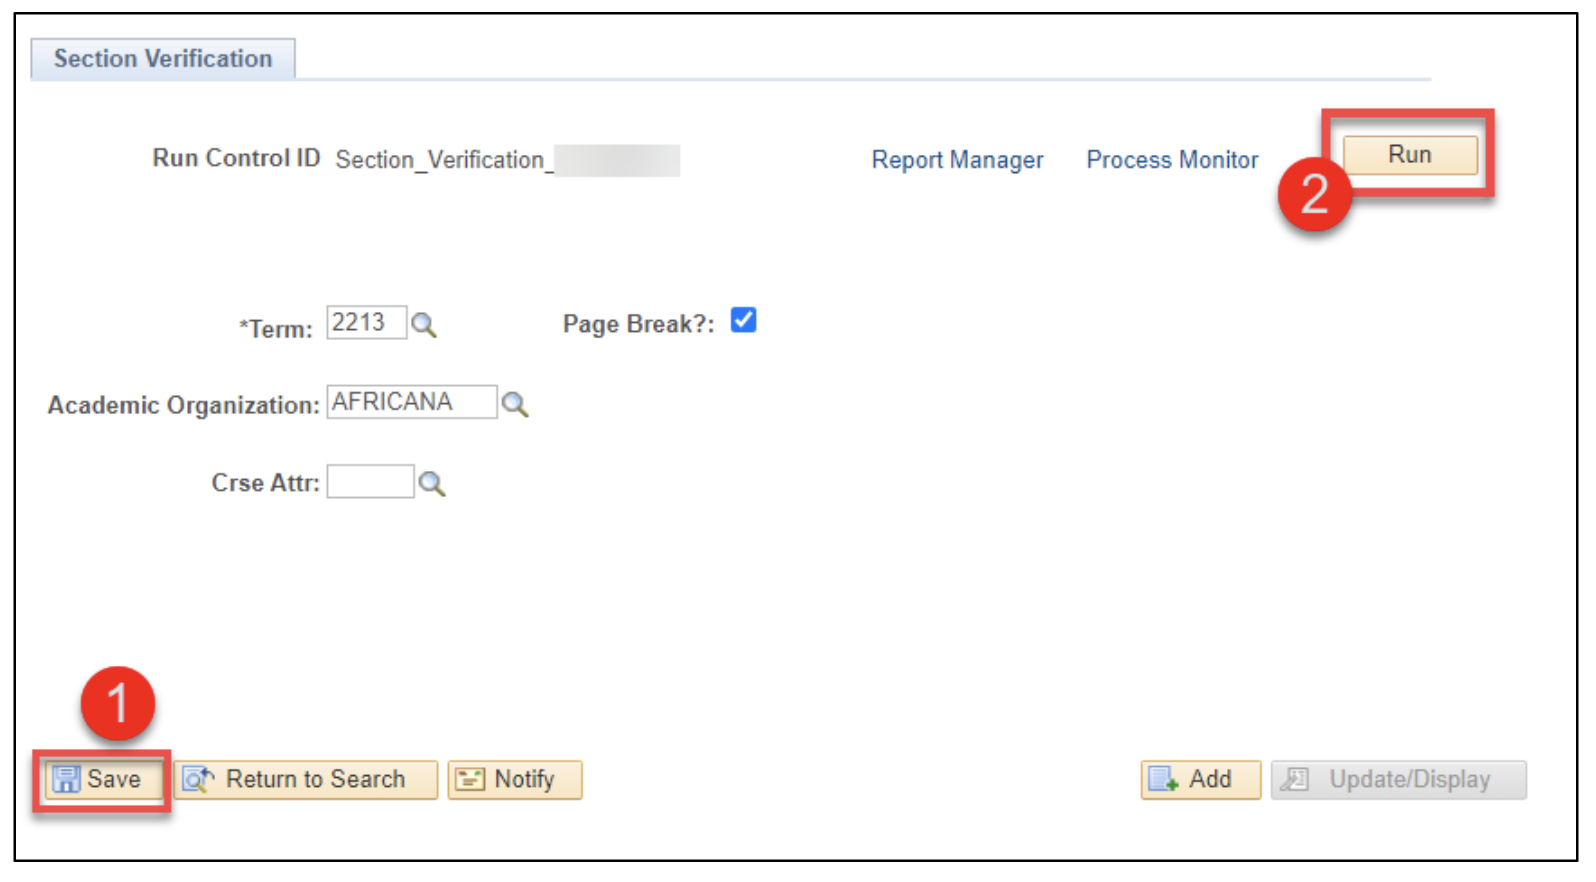
Step 4: Save & Run
Step 4: Save & Run
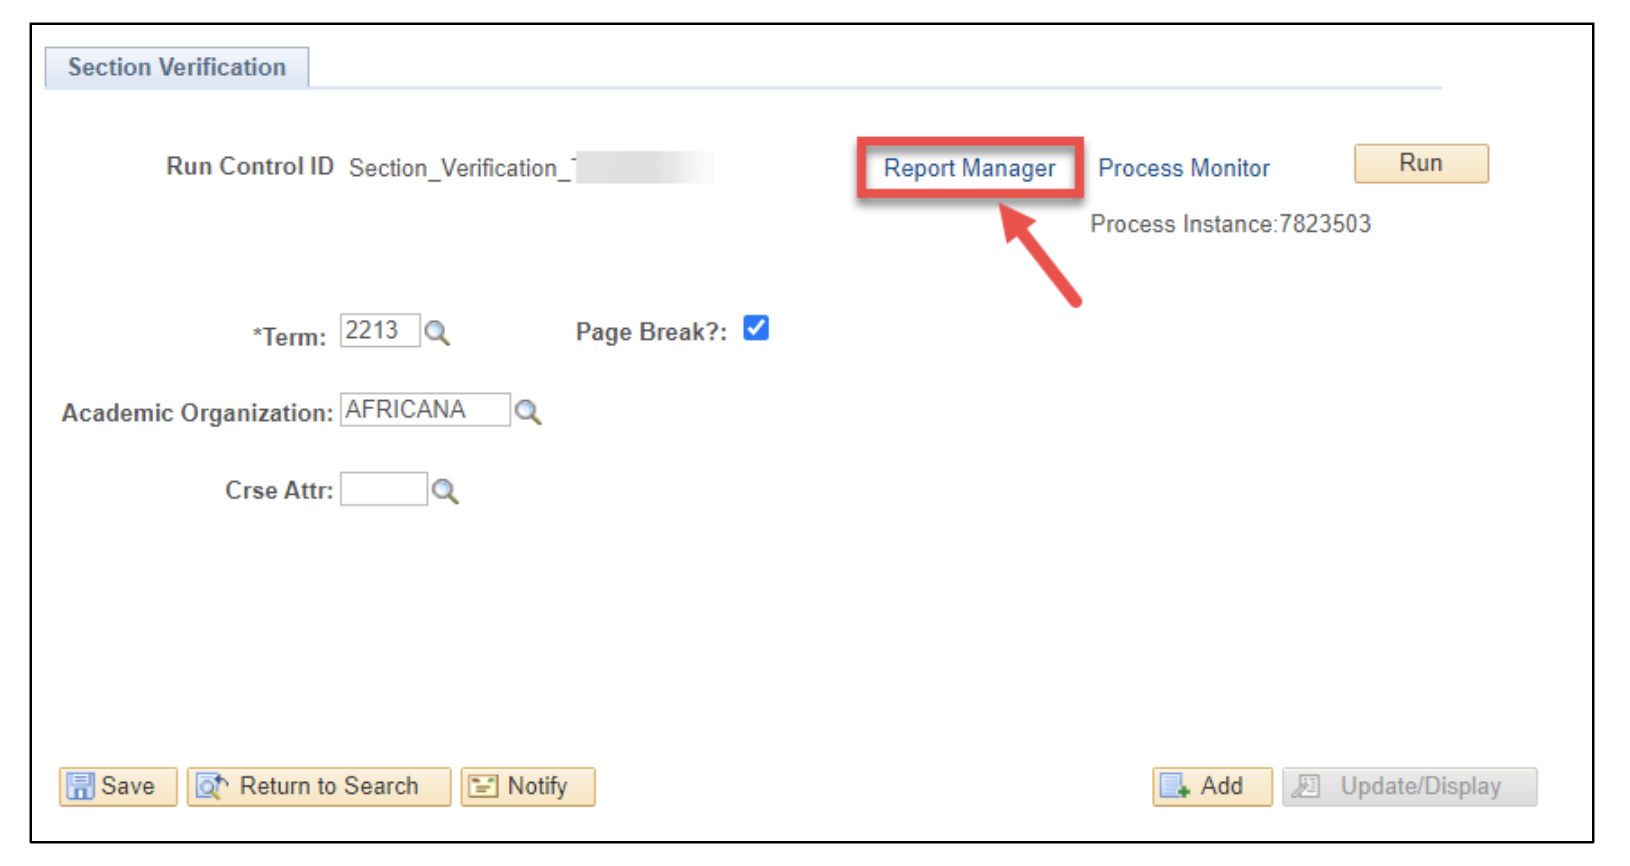
Select “Save.” Then, select “Run.”
Step 5: Process the Request
Step 5: Process the Request
-
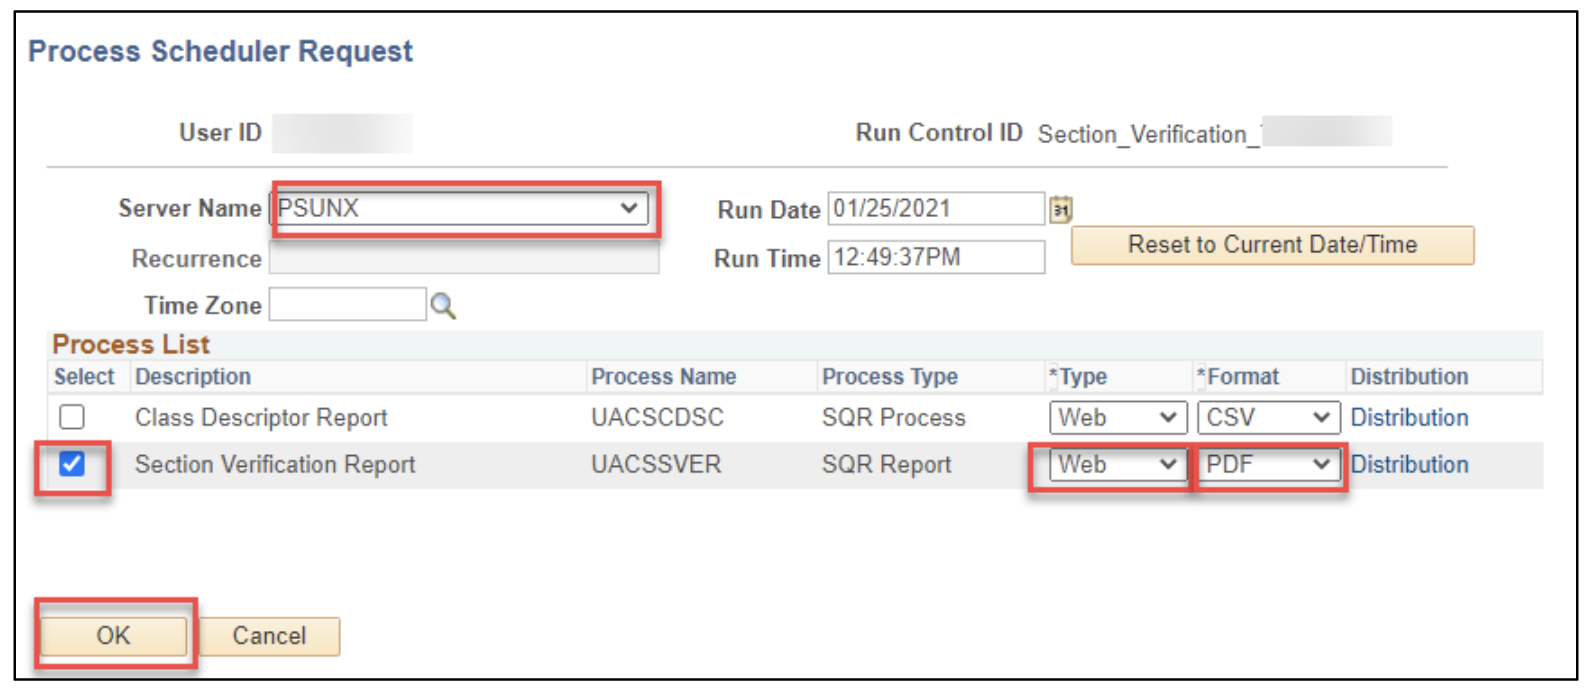
Select “PSUNX” for the Server Name.
-
Click the “Section Verification Report” checkbox.
-
Select “Web” for the Type.
-
Select “PDF” for the Format.
-
Click “OK.”
-
A Process Instance Number will appear under the “Run” button. Select the “Report Manager” link.
-
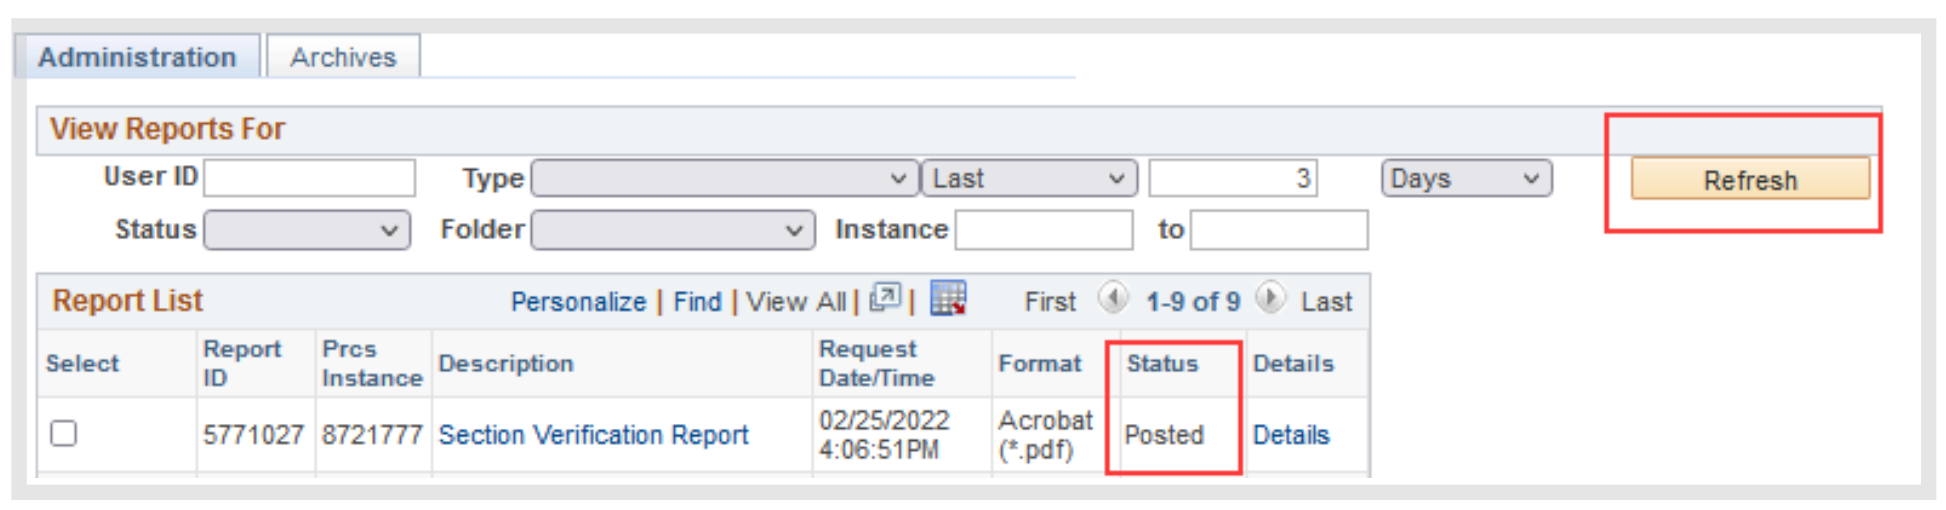
Wait for a status of “Posted.” (You may need to use the “Refresh” button to give you the most current status.)
-
Once the Status shows “Posted,” select the “Section Verification Report” link.

-
A new window will appear.
-
Use the instructions below to review your Section Verification List.
Review a Section Verification List
- Please review all classes listed on the SVL to ensure that all classes added during Initial Scheduling appear.
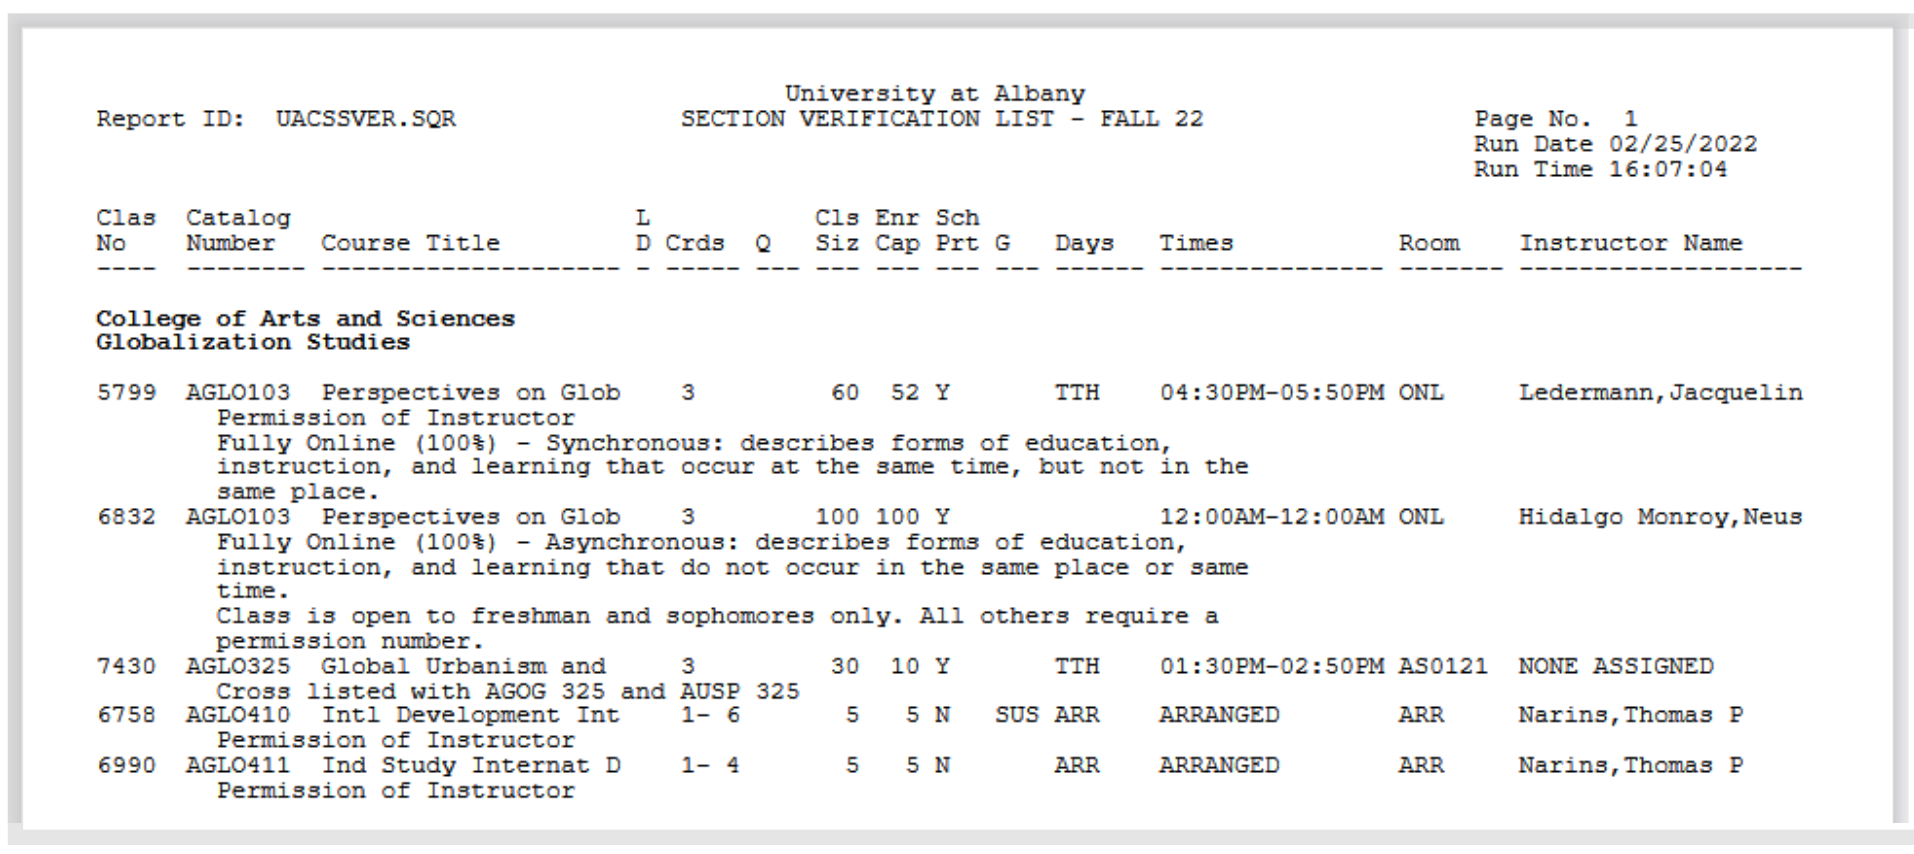
- In the Schedule Print (“Sch Prt”) column, a “Y” means the class section is viewable on the Schedule of Classes for that term. An “N” means the class section is not viewable on the Schedule of Classes for that term. (Learn how to read all the columns listed on your SVL).
- Review the instructors assigned to all classes. Multiple instructors, including teaching assistants (TAs) and graduate assistants (GAs), will be listed if more than one instructor is assigned to the class. The same instructor will show multiple times if there are multiple meeting patterns.
- Review the meeting dates on all mini and hybrid classes.
- If a class has an associated discussion or lab section, please review the class numbers listed in the class notes to make sure they are accurate.
- Review the class notes for other items that need to be updated, including:
- Enrollment requirement groups
- Meeting locations for arranged classes (on and off campus)
- Course fees
- Open Educational Resources
- Class permissions
- Class modality
- Cross listed
- Ensure combined sections are listed properly. The department of the parent sections needs to communicate with child sections about any changes, such as capacities, days/times or cancellation.
- Review Topics Courses to see if updates are needed or if a topic needs to be indicated.
- Review grading basis and variable credit classes for accuracy.
- If a class is being offered in a departmental room, please make sure that’s indicated.
- Section numbers do not need to be changed or reordered.
How to Read an SVL
| Column Name on the SVL | What It Means |
|---|---|
| Clas No | This is the Class Number column. A class number is a four-or five-digit number that identifies each section of a course. |
| Catalog Number | This is the Catalog Subject column. It displays the subject area and catalog number of the class (for example: AAFS142). |
| Course Title | This is the Course Title column. It displays the title of the class as indicated in the catalog. If the class has a topic assigned, the topic will appear in this column instead of the title. Note: The title may get cut-off, as the SVL limits it to 20 characters. |
| L D | This is the Lab / Discussion column. An “L” will display in the column if the class is a lab. A “D” will display in this column if the class is a discussion component. |
| Creds | This is the Credits column. It displays the number of credits of the class. If the class is being offered as a variable credit class, the SVL will reflect this (for example: “1-3”). If the class is a lecture with an associated lab or discussion, the class credits will be listed under the lecture component and a “0” will be listed under the lab or discussion. |
| Q | This is the Class Session column. This column will be empty if the class is a semester-length class. If the class is being offered in another session, it will be reflected in this field. (For example: “8W1” for 8 Week 1 classes, “MIN” for mini-session classes and “6W2” for 6 Week 2 classes.) |
| Cls Size | This is the Class Size column. It displays the requested room capacity for the class. |
| Enr Cap | This is the Enrollment Capacity column. It displays the enrollment capacity for the class. |
| Sch Prt | This is the Schedule Print column. A “Y” in the column means the class will display on the Schedule of Classes. A “N” in the column means the class will not display on the Schedule of Classes. |
| G | This is the Grading column. If the class has A to E grading, then this column will remain empty. If the class has another grading basis, it will be indicated in this column. “GIU” means master’s thesis grading. “SUS” means satisfactory/unsatisfactory. “GLU” means load only. “NON” means non-graded component. “PNP” means pass/not pass. |
| Days | This is the Days column. It displays the days the class will meet. If the class is fully online and asynchronous, this column will be empty. “M” means Monday. “T” means Tuesday. “W” means Wednesday. “TH” means Thursday. “F” means Friday. “SA” means Saturday. “SU” means Sunday. “ARR” means arranged, meaning meeting times are determined by the instructor and student. |
| Times | This is the Times column. It displays the time of the class. “Arranged” meeting times are determined by the instructor and student. “12:00am-12:00am” can also mean the class is arranged, or it can mean the class is fully online and asynchronous. |
| Room | This is the Room column. It displays the classroom where the class will meet. (Review Building Codes.) “ONL” means the class meets online. “OFC” means the class meets off campus. “ARR” means the class location is arranged by the instructor. |
| Instructor Name | This is the Instructor Name column. It displays the instructor who is listed to teach the class. If more than one instructor is assigned to the class on the Schedule of Classes (including teaching assistants and graduate assistants), then multiple instructor names will be listed. |
SVL-columns