

EAB Navigate is a student information/communication platform and early alert system that UAlbany uses to support student success initiatives.
EAB Navigate allows faculty and staff to view a student record, communicate with students, connect students with other staff and services, set up appointments, run data reports and much more. Data from PeopleSoft integrates into EAB nightly.
You can request new access to EAB or update user permissions.
Please select a link below to skip to that section of the guide:
- Log in & View Your Home Screen
- Set Availability (Office Hours) & Manage Appointments
- View Your Courses on Your Professor Home Screen
- View a Student Record
- Add a Note
- Manage Alerts, Cases & Progress Reports
- Communicate with Students
- Manage In-term Progress Reporting
- View Student Data with Dashboards
- Managing EAB Navigate Kiosks
Log in & View Your Home Screen
Log into EAB Navigate. You’ll be prompted to provide your UAlbany Net ID and password.
login
View Your Home Screen
View Your Home Screen
Once you log in, you’ll be taken to your home screen, which will default to your primary role (Advisor, Professor, Staff, Administrator or Coach).
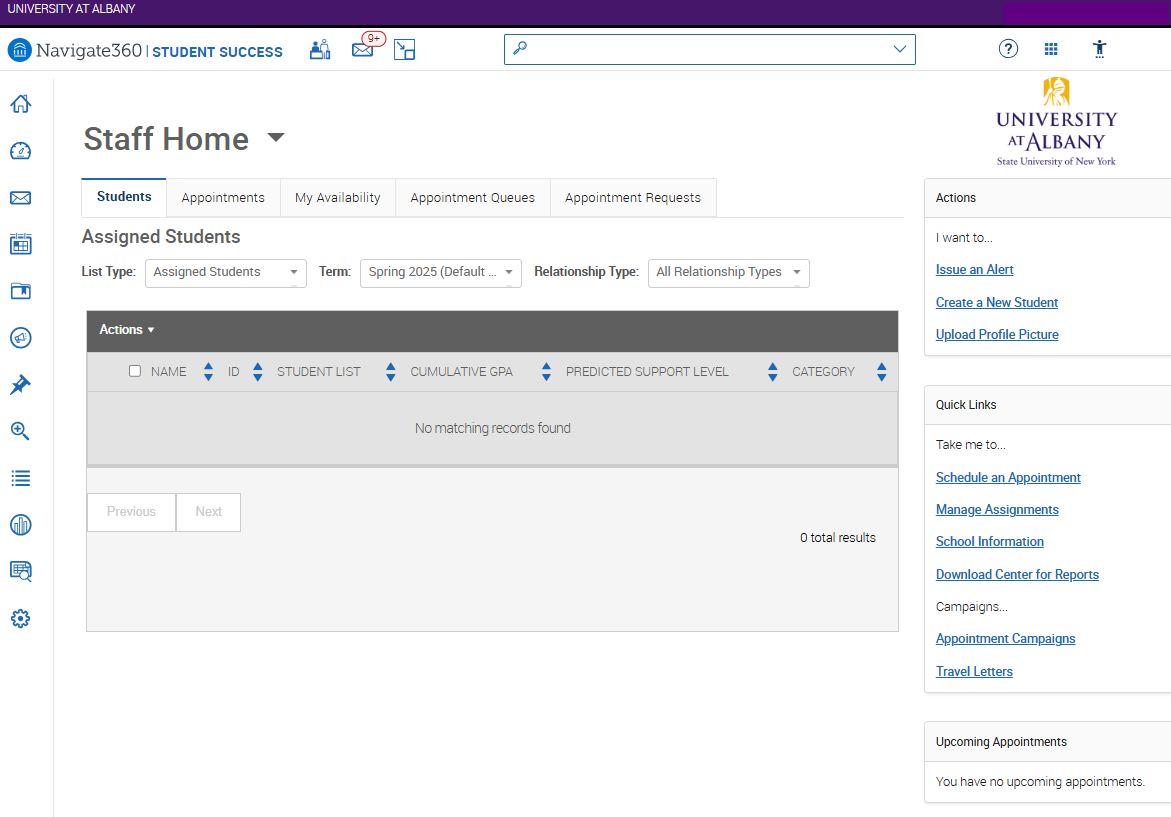
If you have multiple roles, changing the role on the home screen will change the items tailored to that role.
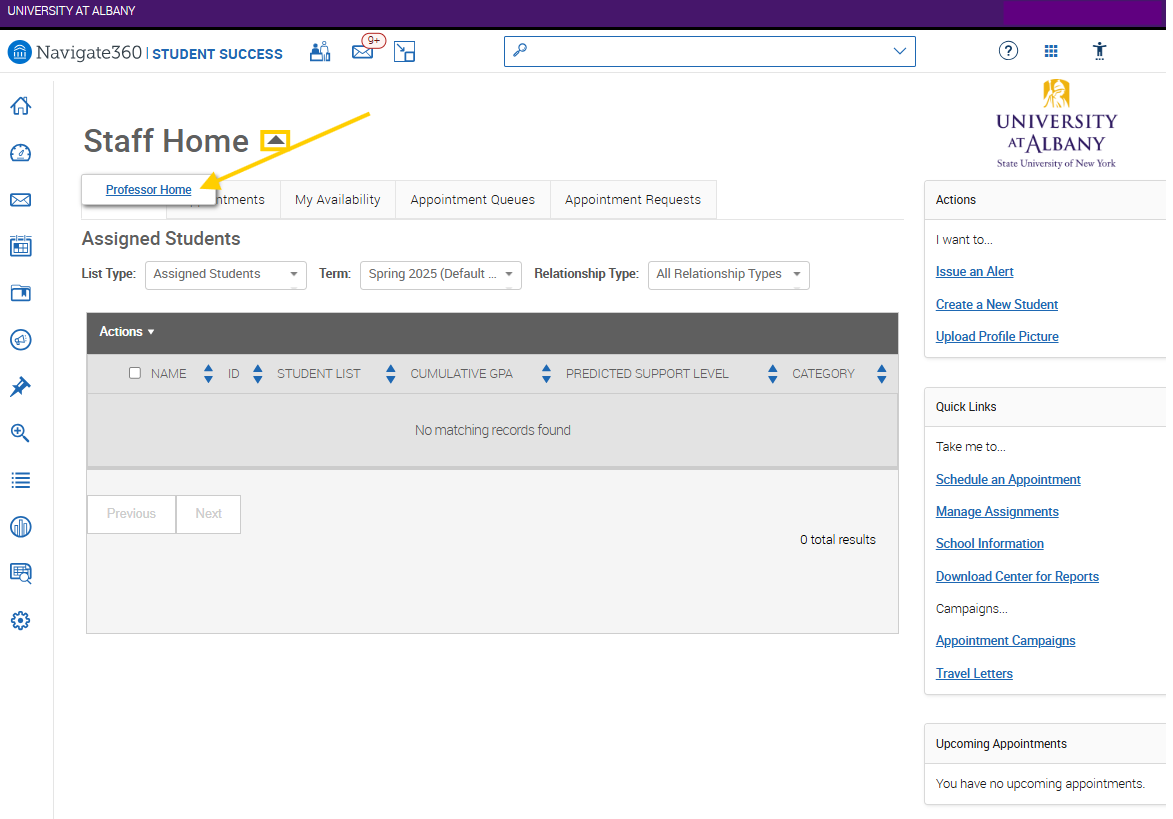
To change your home screen view, click on the arrow next to the name of your current home screen (for example “Professor Home” or “Staff Home”) and select the option you want.
Set Availability (Office Hours) & Manage Appointments
availability
Set & Manage Your Availability (Office Hours)
Set & Manage Your Availability (Office Hours)
Step 1: Sync Your Outlook Calendar with EAB
Calendar sync is a way to make sure EAB appointments are shown on your professional Outlook calendar and any constraints on your professional calendar are reflected in EAB.
Calendar sync is recommended for faculty and staff users working with appointments in EAB to prevent double booking.
To sync your calendar:
- Select the calendar icon in EAB’s left navigation bar.
- On the “My Calendar” page, select the “Authorize Office 365” button.
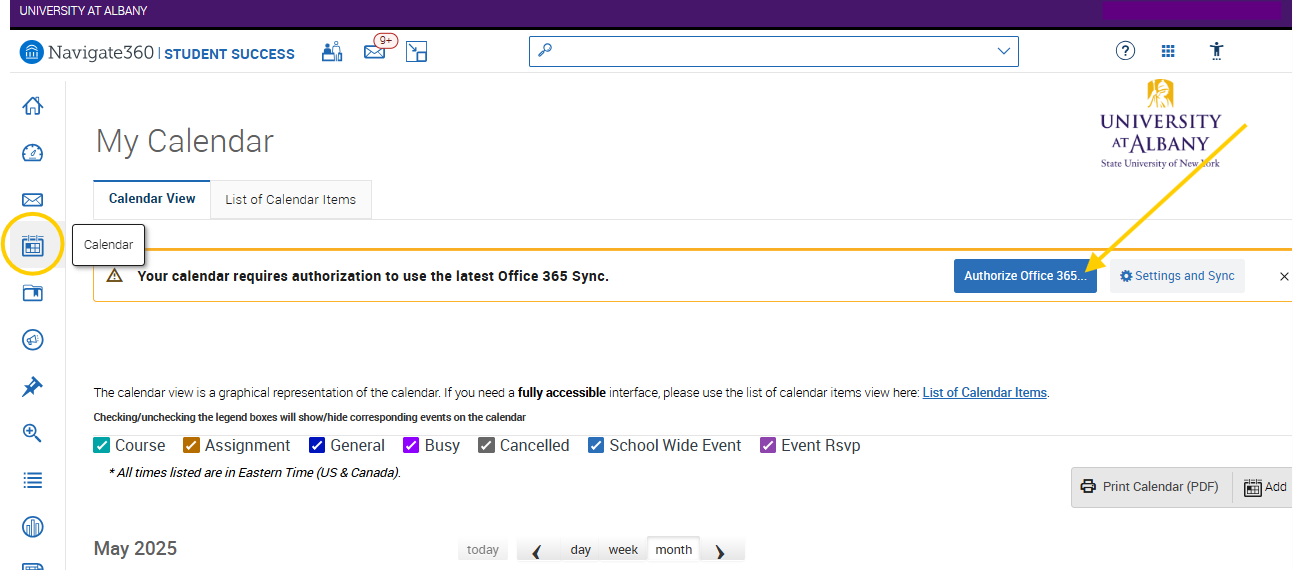
- You’ll be redirected to a Microsoft login page. Use your UAlbany Net ID and password to authorize the sync.
Step 2: Set Availability
To set availability in EAB Navigate:
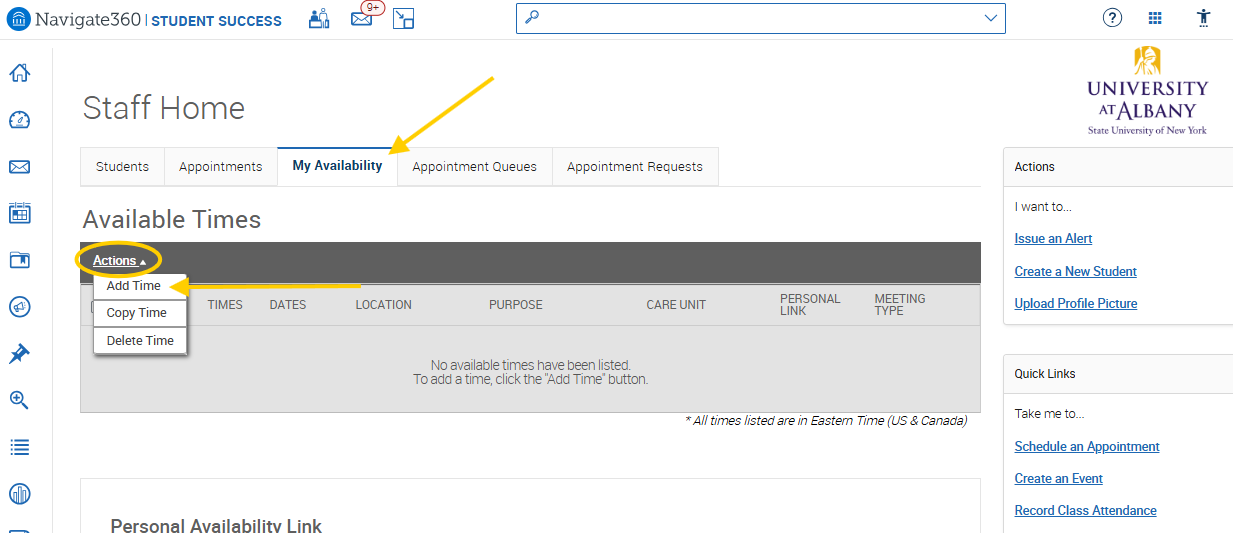
- Choose “My Availability” at the top of your home screen.
- On the “My Availability” page, click on “Actions,” then “Add Time.”
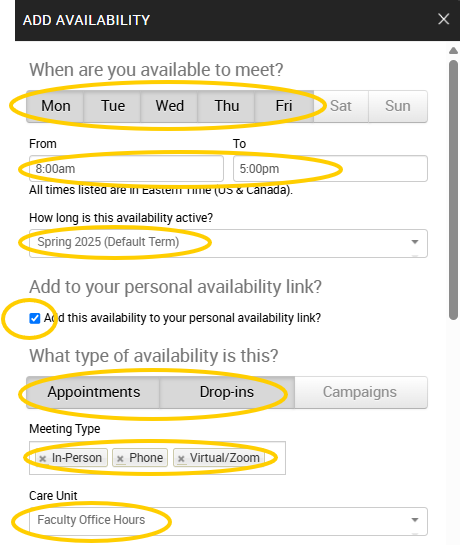
- Select the dates/times. These will be synced with your Outlook calendar. Note: We encourage you to select, “Add to your personal availability link.” This will make it easier for students to schedule with you.
- Select “How long is this availability active?” You can set this each semester.
- Select “What type of availability is this?” The most common are “Appointments” and “Drop-ins.”
- Set your “Care Unit” and your “Location.”
- Faculty members should select “Faculty Office Hours” for their “Care Unit” and set their department as their “Location.”
- Advisors should select their department’s name for “Care Unit” (for example: Academic Advising) and should set where they meet with students as their “Location.”
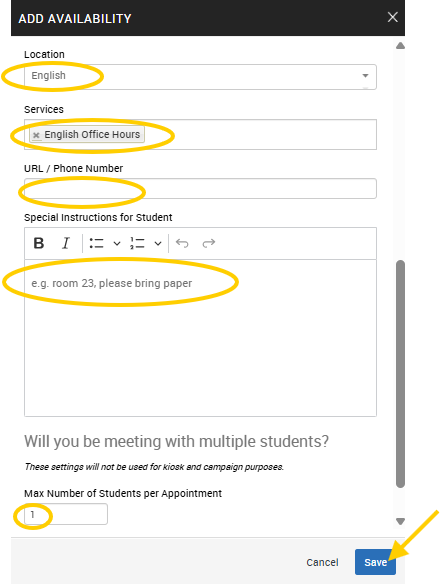
- Select the services you are available for by appointment/drop-in. You can select multiple.
- Include a URL or phone number and any special instructions for the student. You can also limit the number of students per appointment.
- Click “Save.”
Step 3: Manage Availability
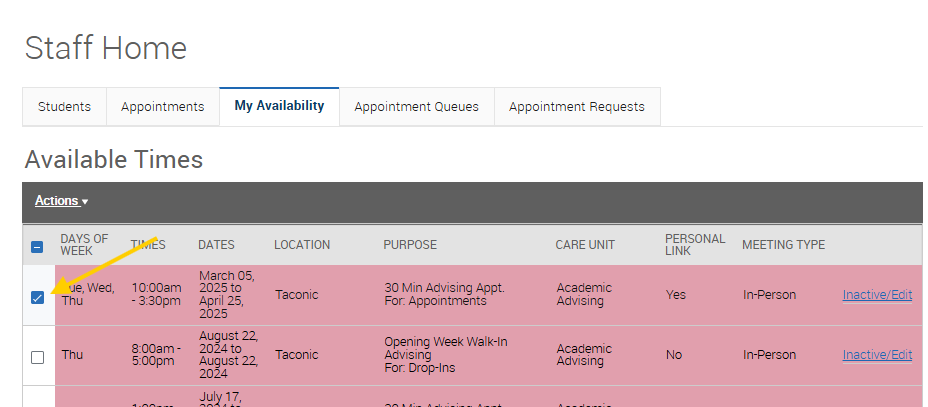
Once your availability is set, this will generate a “Personal Availability Link,” which can be shared with students for them to easily make appointments with you.

To delete or edit availability, click on the box on the left side next to the availability you wish to change, then click “Actions” and “Delete Time.”

Manage Appointments
Manage Appointments
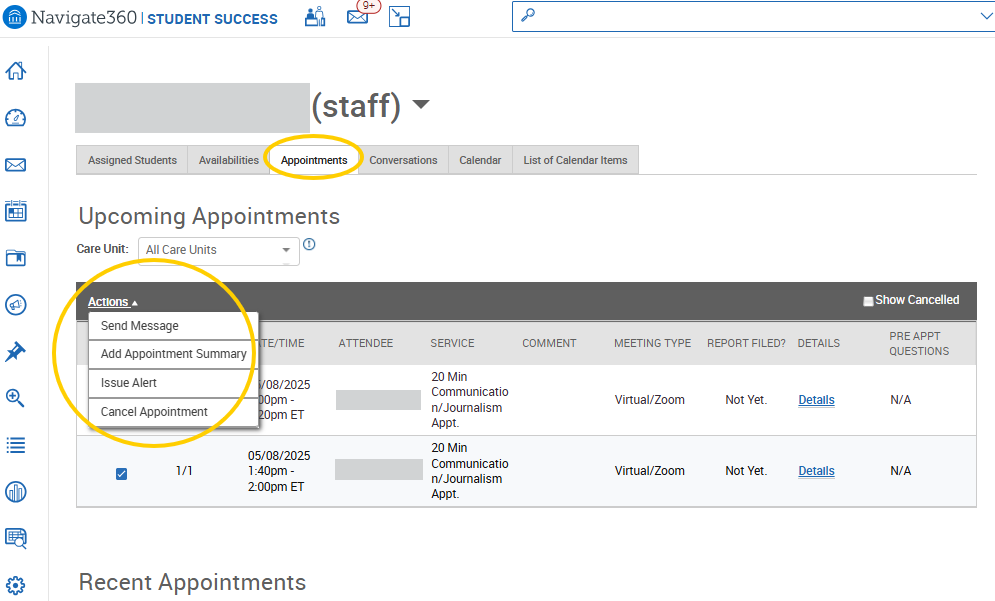
You can manage your appointments under the “Appointments” tab on your home screen.
If you highlight a certain appointment and click “Actions,” you may send a message to the student, add an appointment summary to that appointment, issue an alert on the student for advisor follow-up, or cancel the appointment.
Submit an Appointment Summary
Submit an Appointment Summary
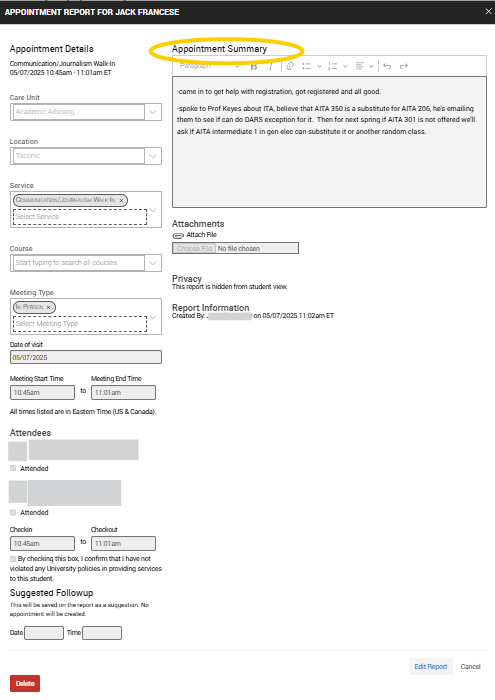
An appointment summary is a great way to document the appointment on the student’s file for record keeping and allowing any other faculty and staff members, where appropriate, to view a summary of the conversation. Appointment summaries are not shared with the student.
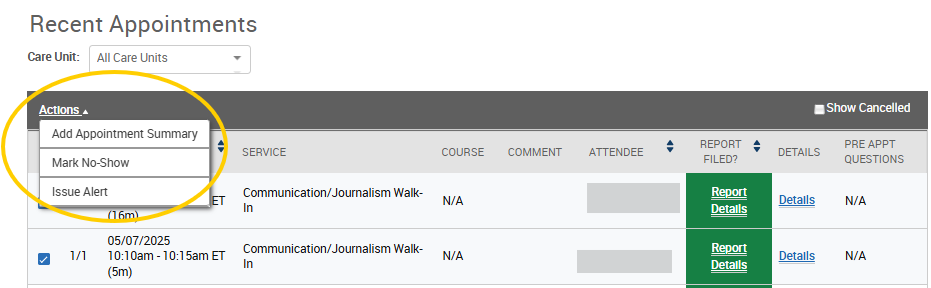
Under “Recent Appointments,” click on the appointment you would like to provide a summary for and choose “Actions.” Here you will have the option to add the summary, mark the student as a no-show, or issue an alert for advisor follow up.
The appointment reports show up in the “History” tab on the student’s file. Some Care Units have a customized appointment summary specifically tailored to the reporting needs for a Care Unit.
Note: Information provided in an appointment summary has restricted visibility that is controlled by platform permissions defined by the Care Unit. Select appointment summaries are shared across Care Units to enable wrap around and coordinated care.
Courses on Your Professor Home Screen
courses
View Your Courses
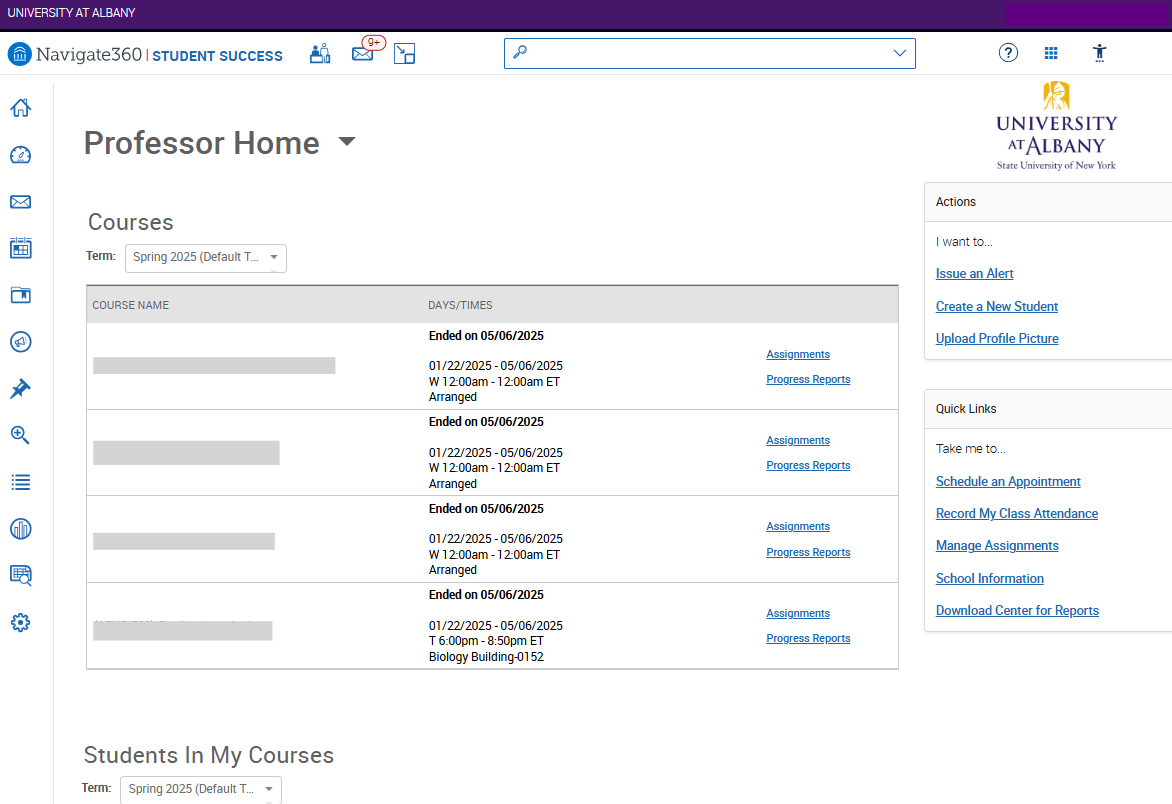
View Your Courses
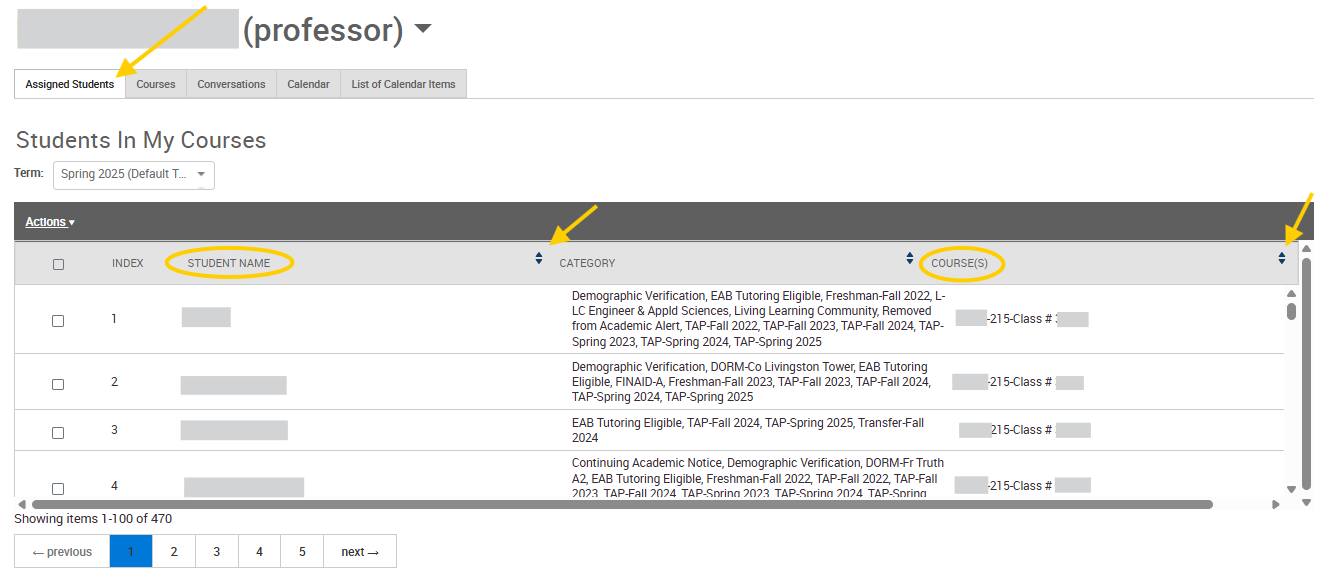
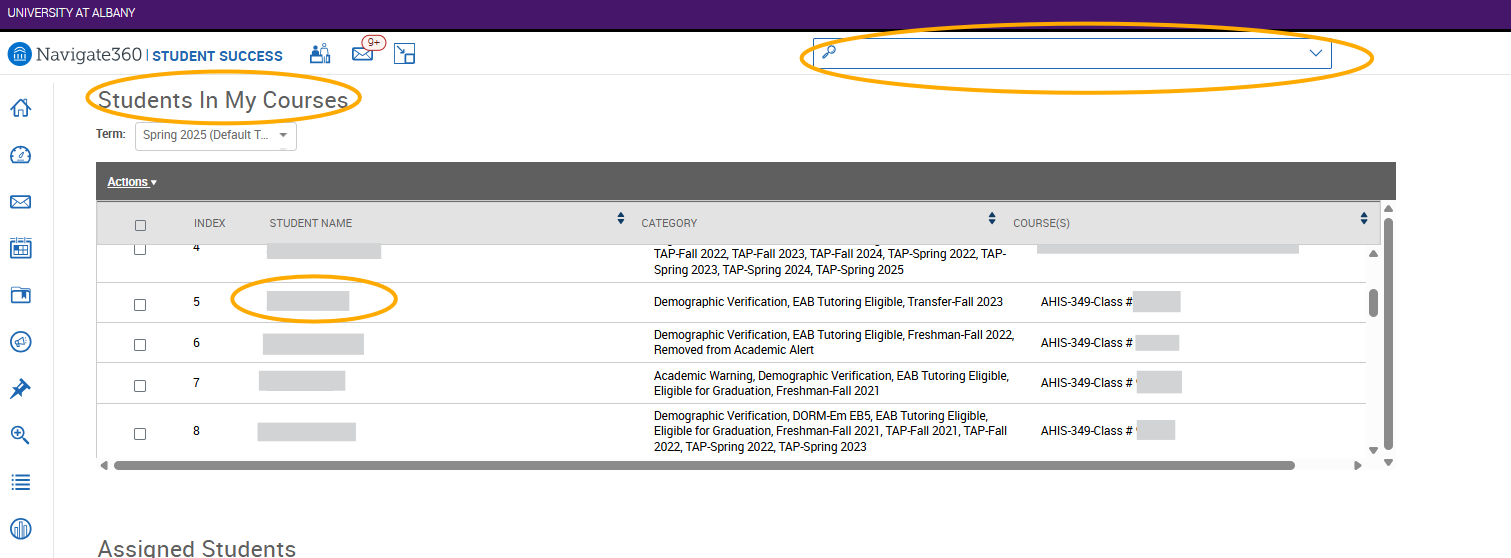
The first tab, called “Assigned Students,” will show you all your students in your courses, which you can also view by term. You can sort alphabetically by clicking on “Student Name” or you can sort by course by clicking “Course.” This is also where you can easily send a message to all of the students in your course.
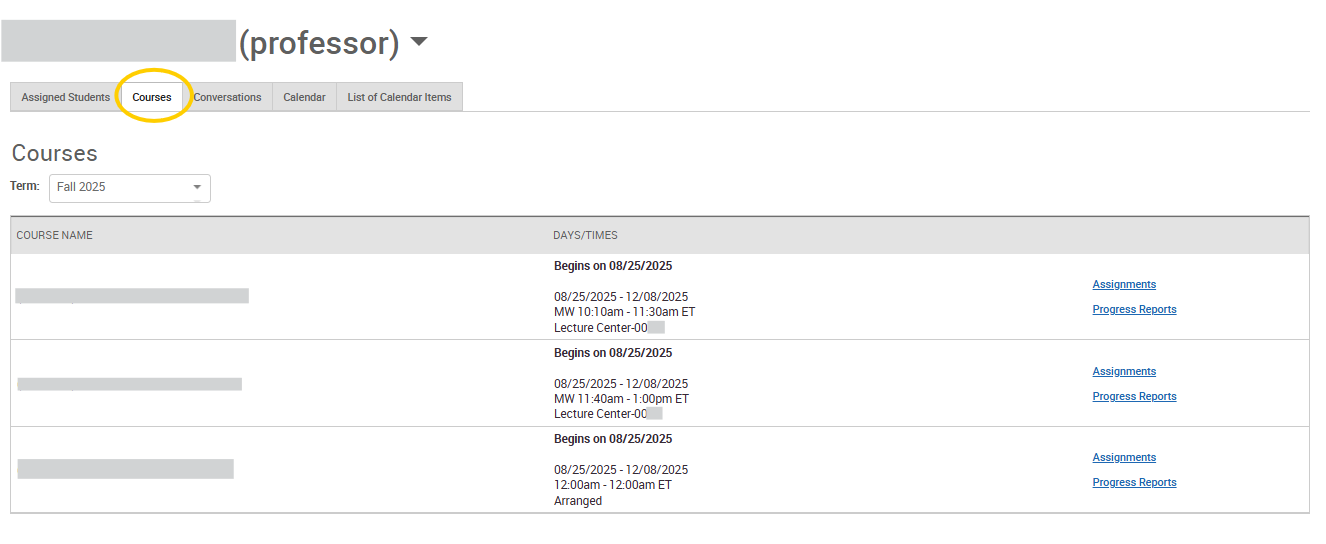
The second tab called “Courses” on the homepage will show all your courses, which you can view by term.
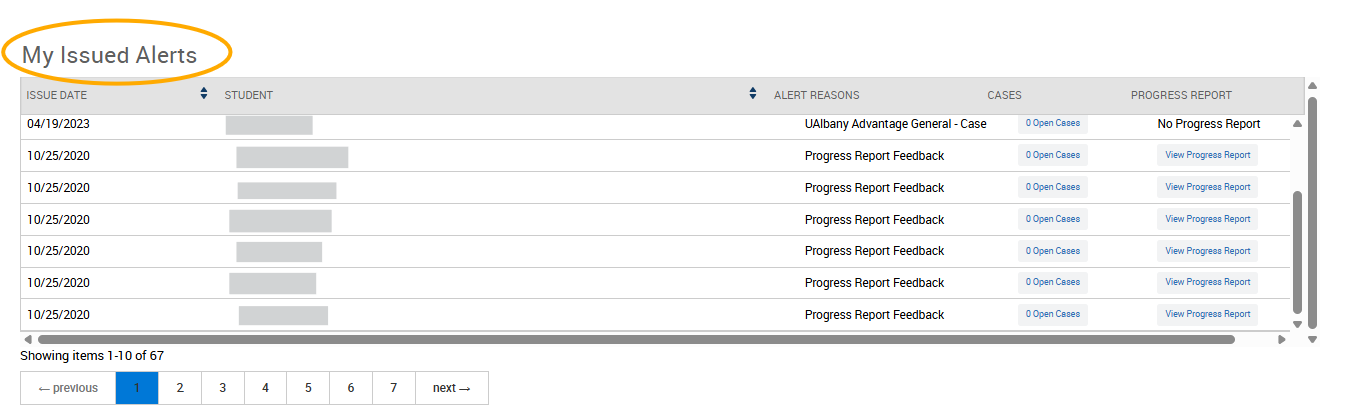
Lastly, you will see “My Issued Alerts,” which are any alerts initiated by you. This includes in-term progress reports and any individual alerts you open for a student.
Record Attendance
Record Attendance
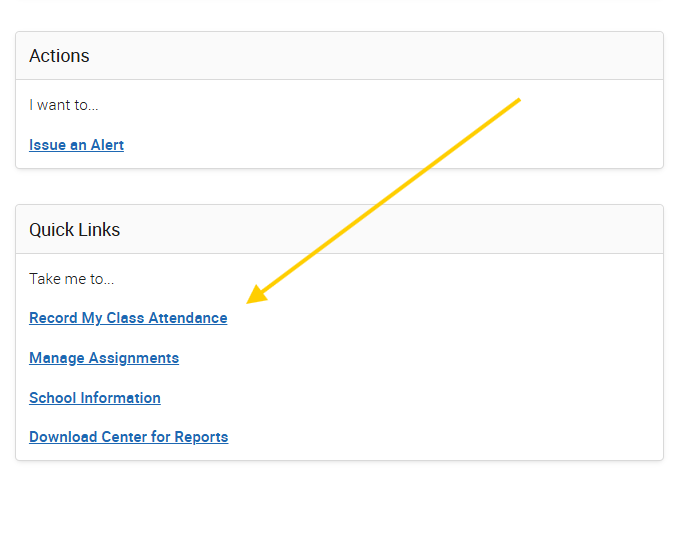
Under “Quick Links” click on “Record My Class Attendance.”
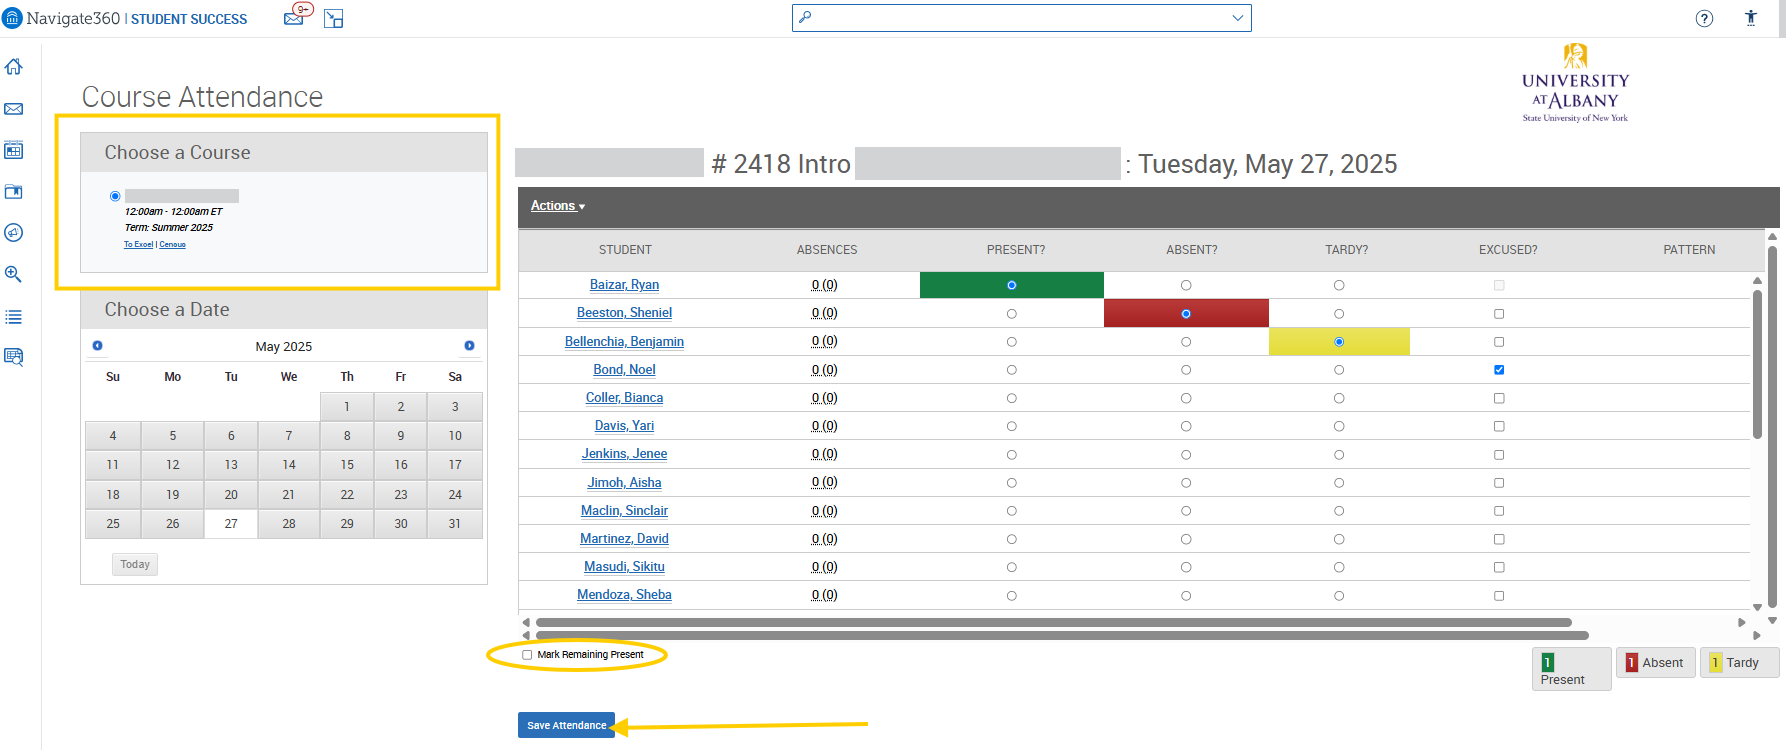
If you have multiple courses, they will be shown on the left. After you choose which course, you can mark a student as present, absent, tardy, or excused. You can also check the box "Mark Remaining as Present." Click "Save Attendance."
View a Student Record
student-record
Access a Student Record
Access a Student Record
You can access a student record a few different ways:
- You can click directly on a student name, which is highlighted blue and underlined on your home screen.
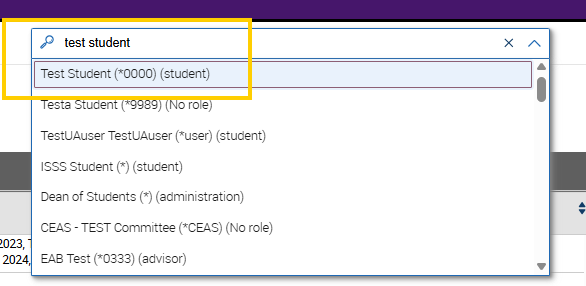
- You can search the student by typing in their name, email address or student ID in the “Quick Search” field at the top of the page.
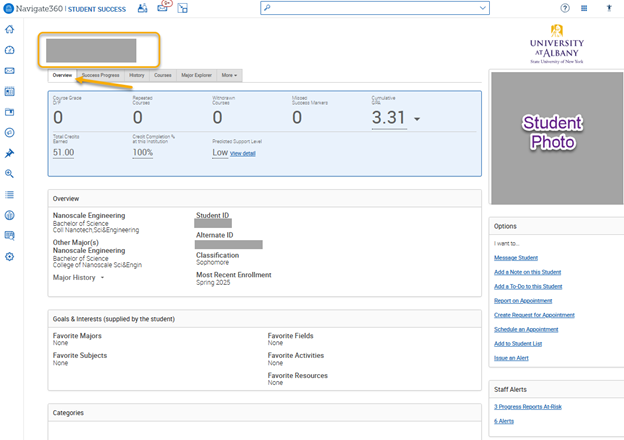
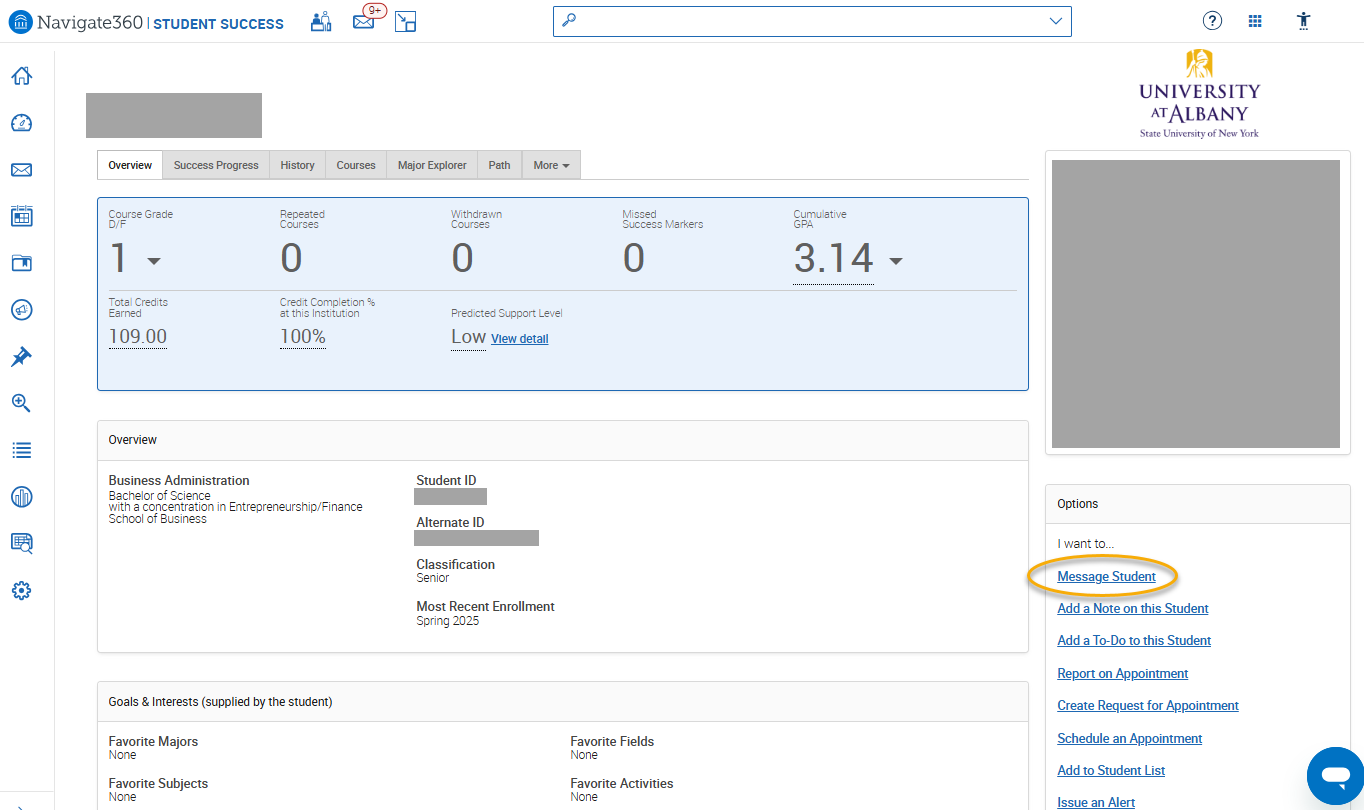
Once you access a student record, the student’s name will appear at the top of the page and a picture of the student will appear on the bottom right.
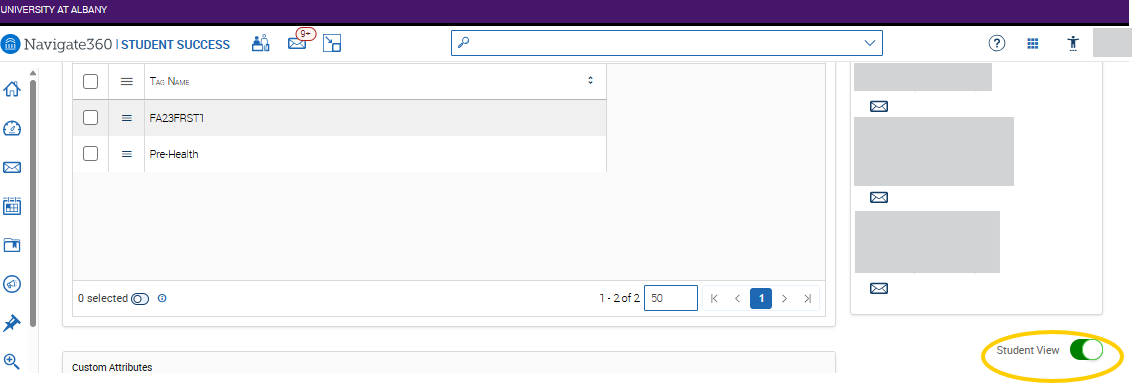
To view a student’s record from the perspective of the student, scroll to the bottom of the page and toggle on “Student View.”
Overview Tab
Overview Tab
The “Overview” tab will give basic student information, such as GPA, major, classification (for example: “Senior”) and the most recent semester’s course enrollment.
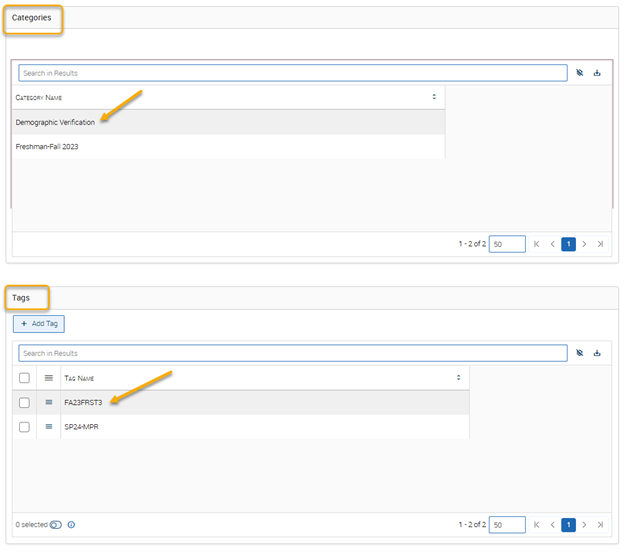
At the bottom of the page, you will see “Categories” and “Tags.” Categories are driven by identifying fields in PeopleSoft. Tags are custom created by EAB Navigate staff and/or faculty to group students together.
On the right side of the page, the “Options” section will allow you to take various actions, such as:
- Messaging the student
- Adding a note on their file
- Reporting, creating and/or scheduling an appointment
- Adding a student to a list
- Issuing an alert

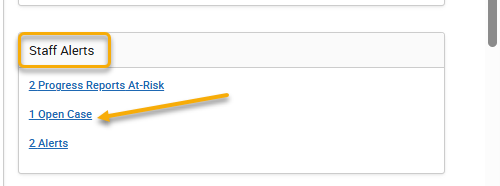
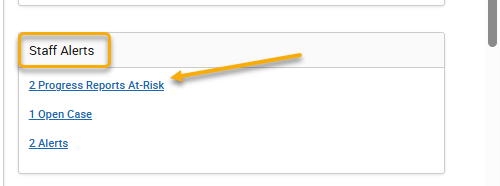
Under “Options,” you will find “Staff Alerts,” where you can easily view any progress reports or alerts for the student.
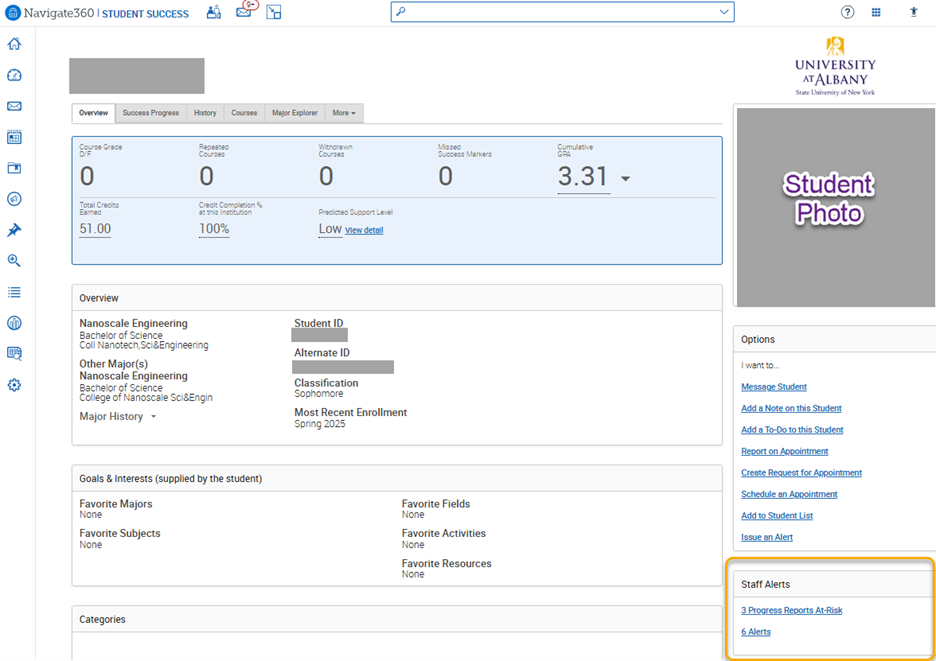
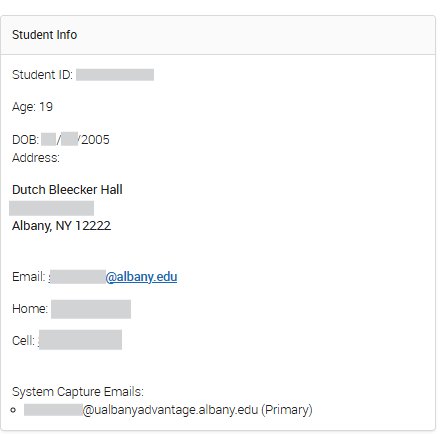
Under “Staff Alerts,” you will find more contact information for the student.
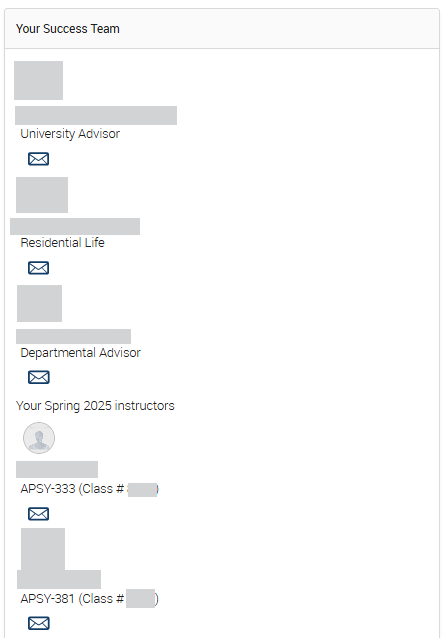
Lastly, you will see the student’s “Success Team,” which includes Residential Life, Advisors and other Instructors.
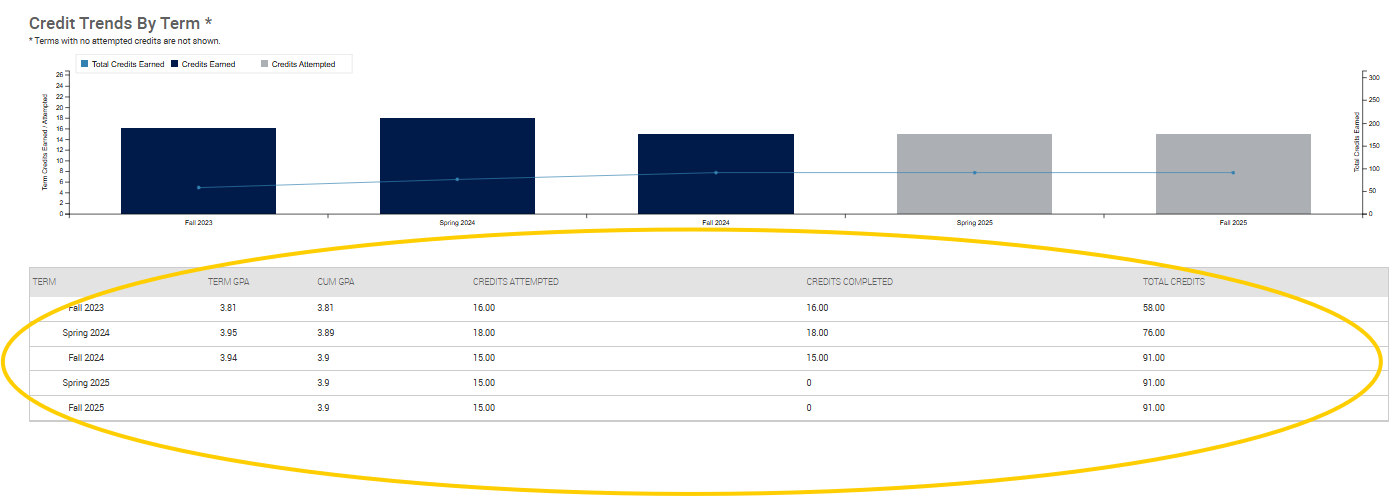
Success Progress Tab
Success Progress Tab
The next tab is called “Success Progress.” If you scroll down, you will see a quick overview of the term GPA, cumulative GPA, and the attempted, completed and total credits by term.

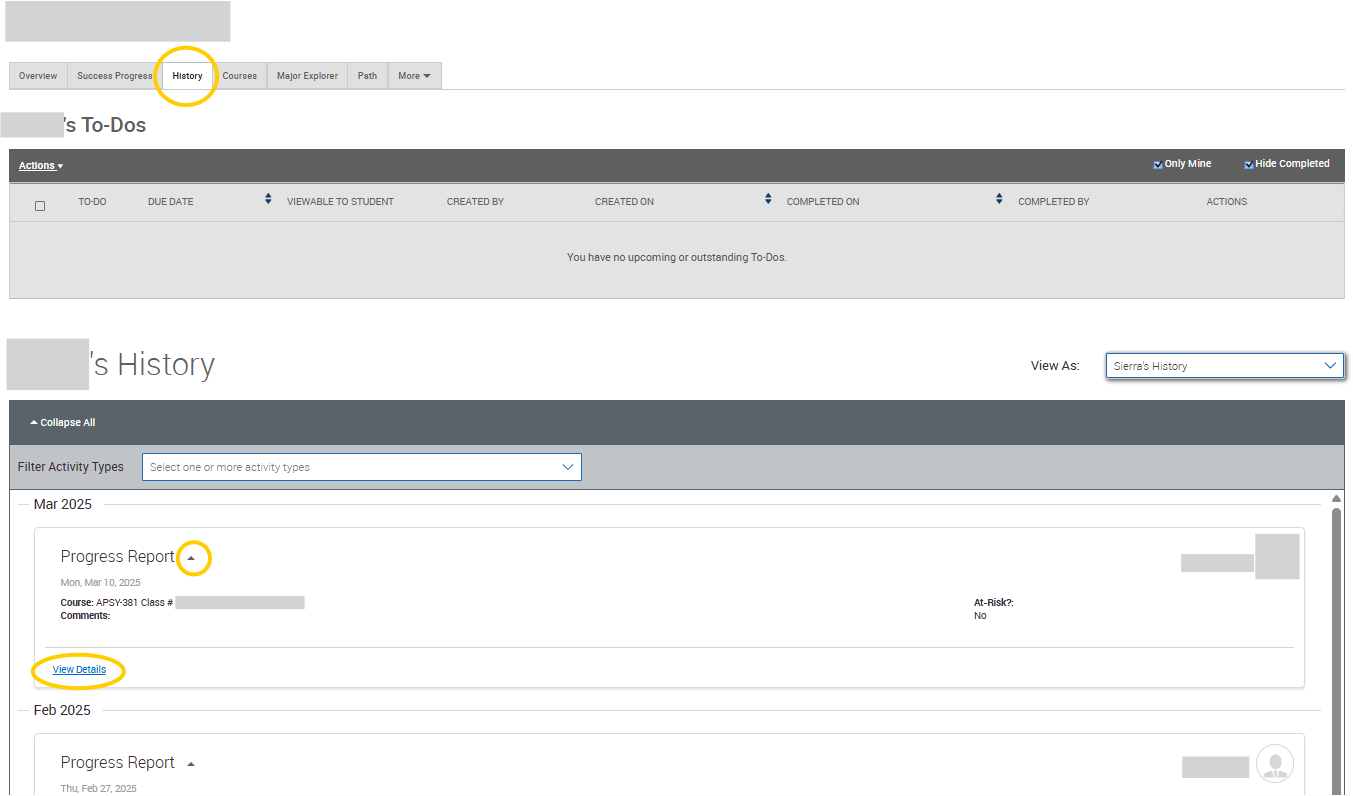
History Tab
History Tab
The “History” tab allows you to view anything that has been added to the student’s record in EAB Navigate, such as appointment details, notes, progress reports, etc.
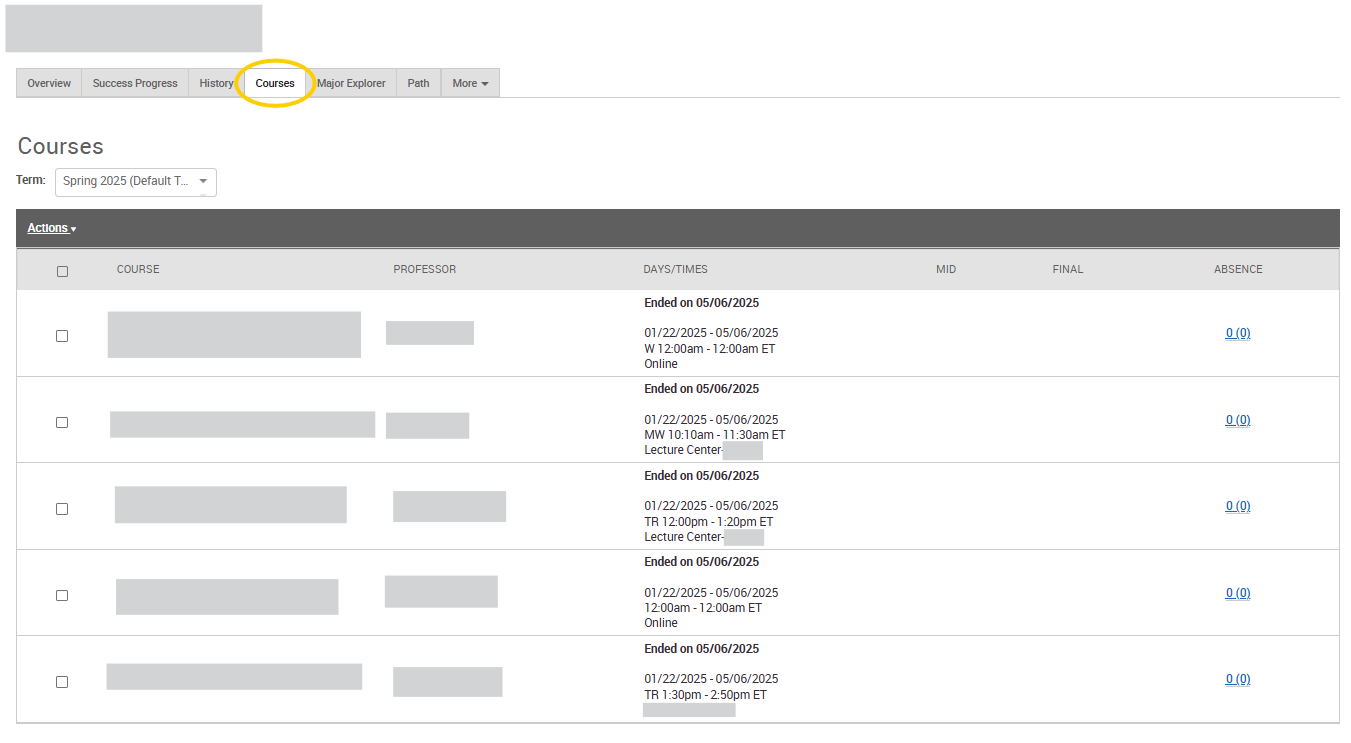
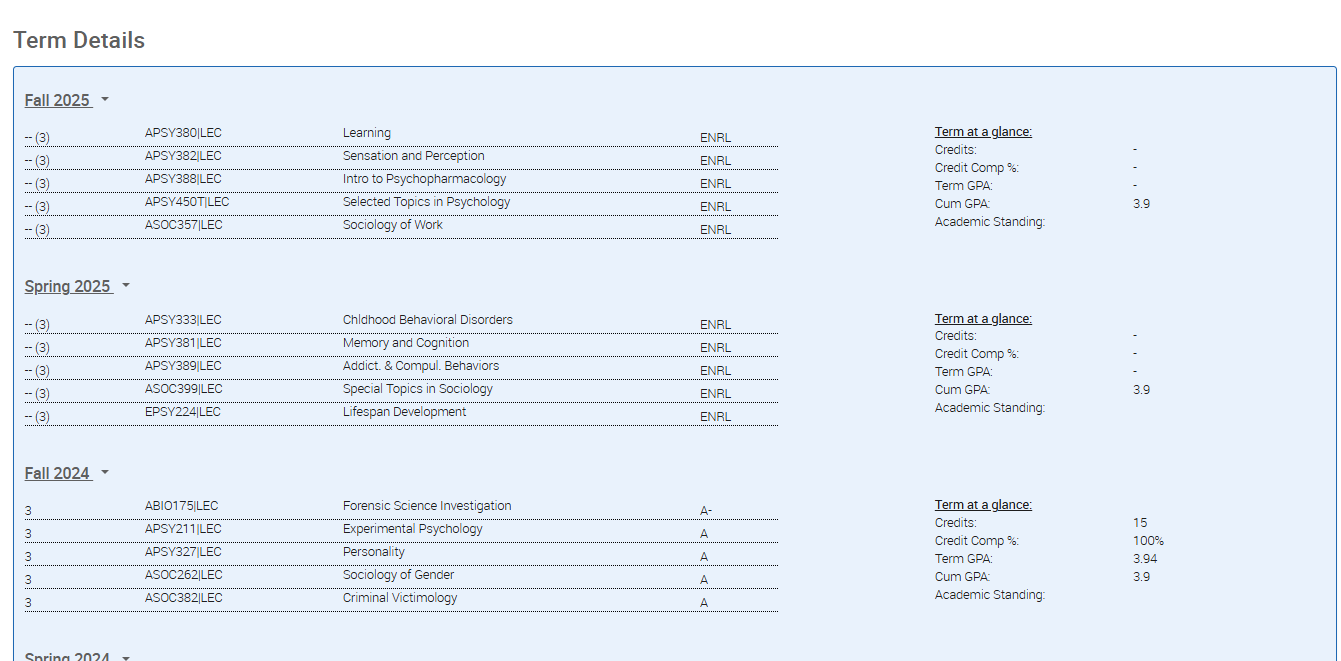
Courses Tab
Courses Tab
The “Courses” Tab allows you to view all the courses the student is enrolled in by term. If you scroll down, you can also view the student’s unofficial transcript.
Major Explorer Tab
Major Explorer Tab
The “Major Explorer” tab allows students and advisors to explore different career paths based on major.

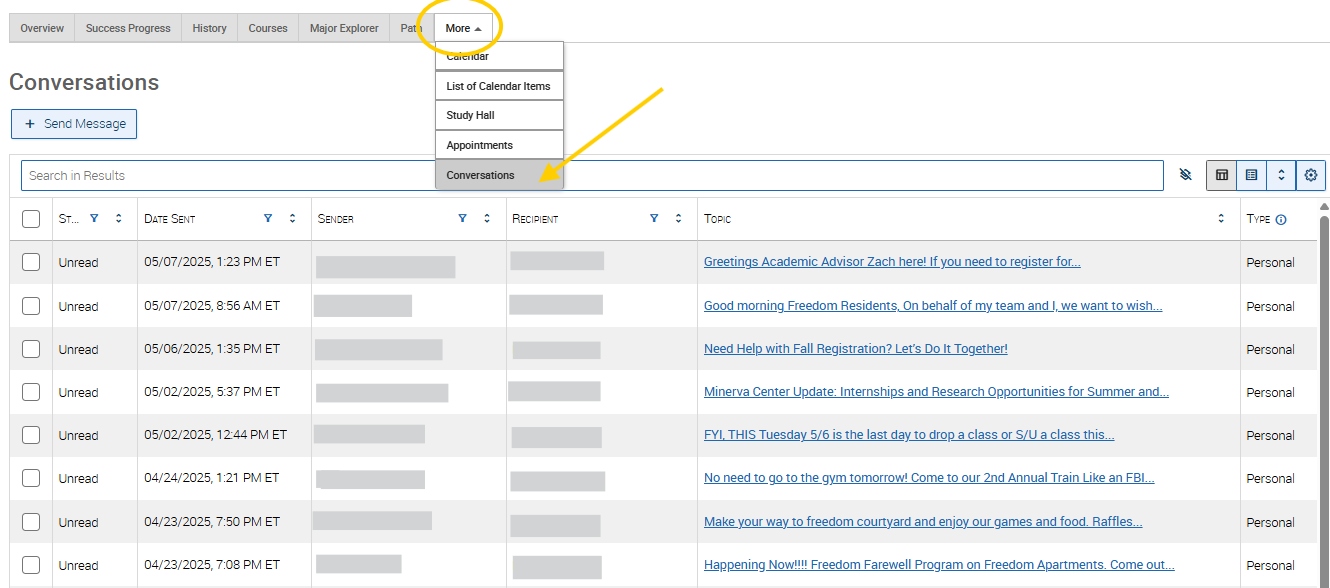
More Tab
More Tab
Select “Appointments” to view the student's recent and upcoming appointments by selecting.
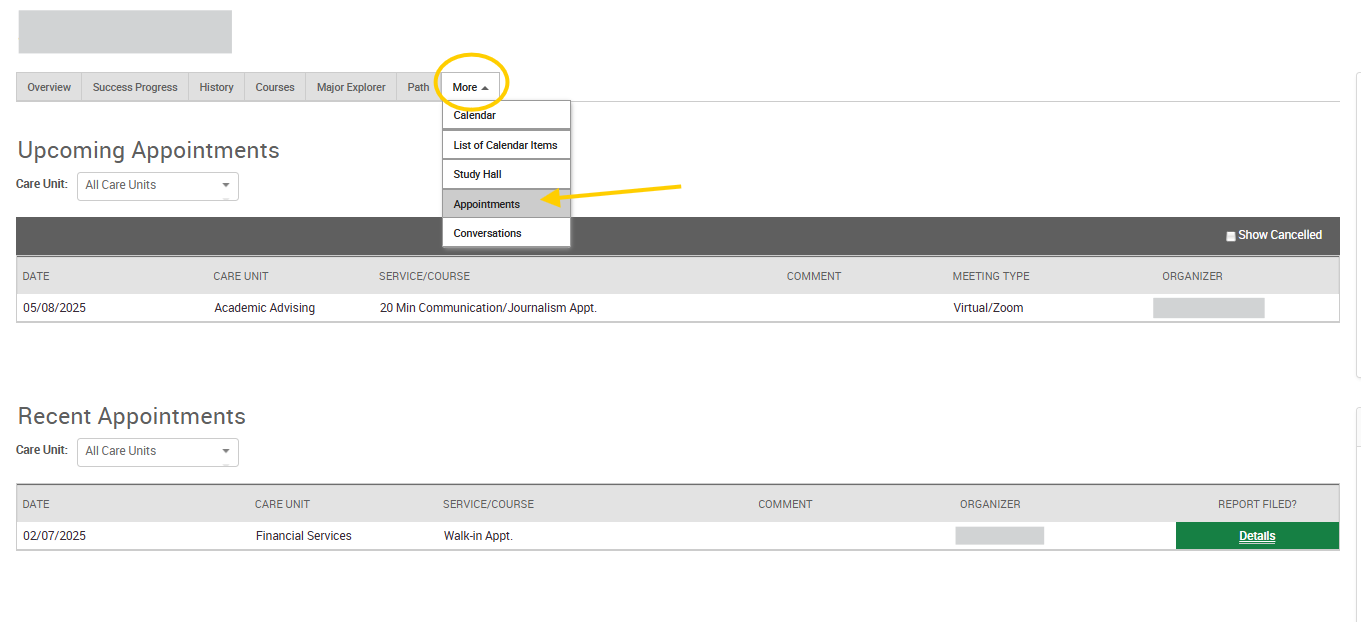
Select “Conversations” to view a record of all emails sent to the student via EAB Navigate.
Add a Note
note
Notes
Notes
You can add a note to a student’s record to document information that isn’t tied to an appointment, email or text. For example, you may want to add a note after having an impromptu conversation with a student.
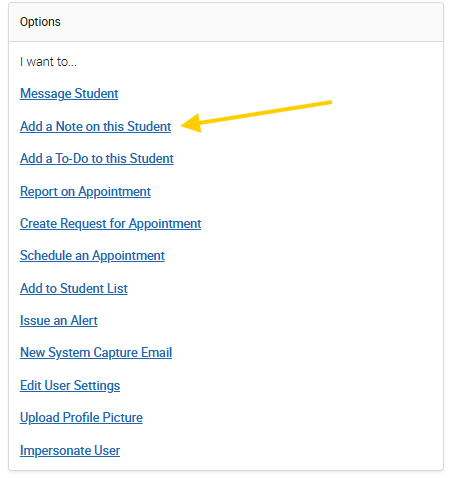
To add a note, navigate to the student’s record. On right side of the “Overview” tab, under “Options,” select “Add a Note to this Student.”
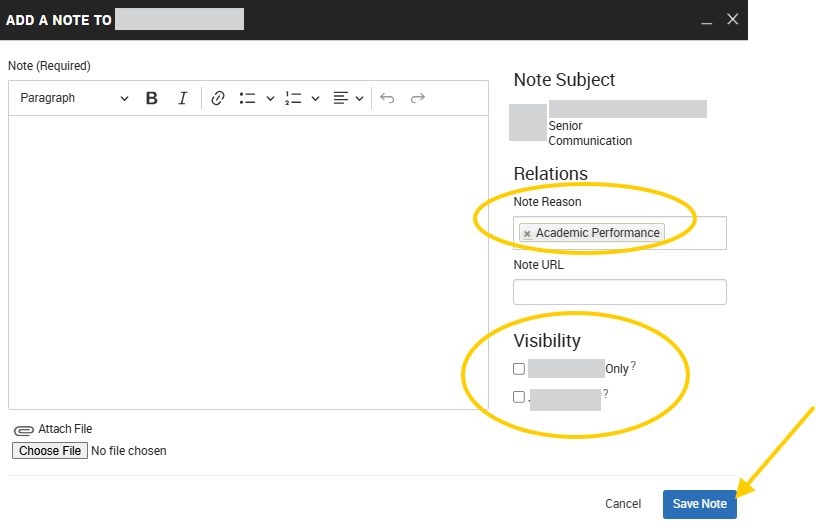
You can choose a “Note Reason” from the drop down as a category. Make sure to click “Save.” As mentioned above, these notes can be found under the “History” tab.
Notes are automatically set to be viewed by other faculty and staff only. You have the option to have the note be only visible to you and/or the student under “Visibility.”
Manage Alerts, Cases & Progress Reports
alerts
Issue an Alert
Issue an Alert
You can issue an alert for a specific student that goes directly to the student’s advisor for follow-up. Make sure to choose a “reason,” which categorizes the alert.


View & Comment on an Open Case
View & Comment on an Open Case
To view an open case, go to the student’s page and, under “Staff Alerts,” click “Open Case.”
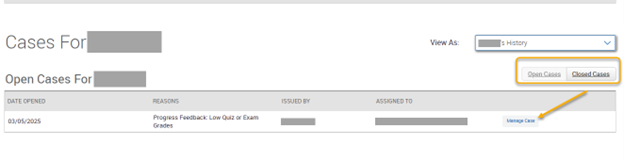
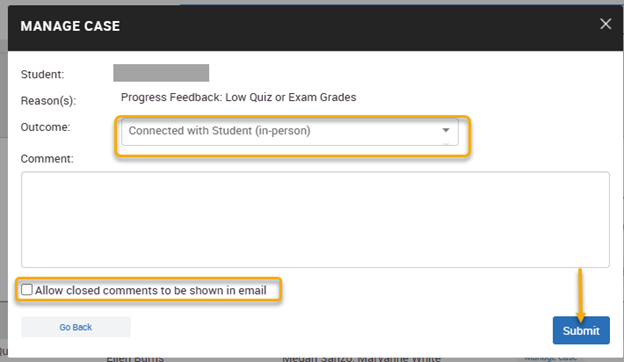
This will take you to a new screen where it will give you the option to toggle between “Open Cases” and “Closed Cases.” Click on “Manage Case” for more information.
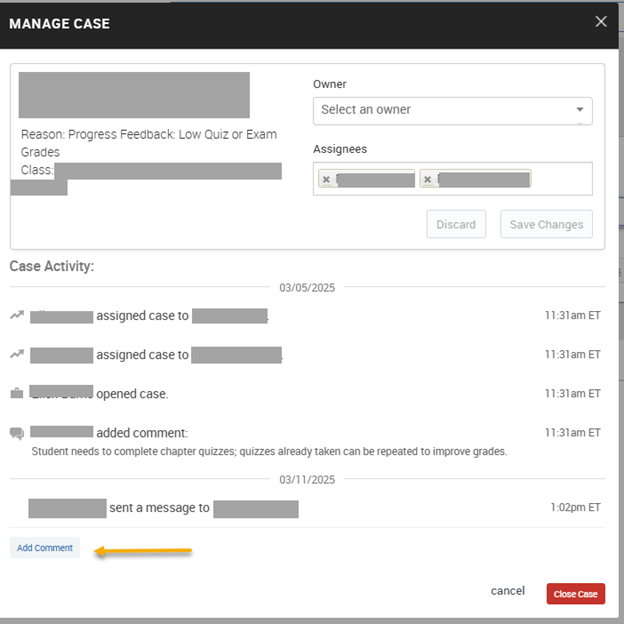
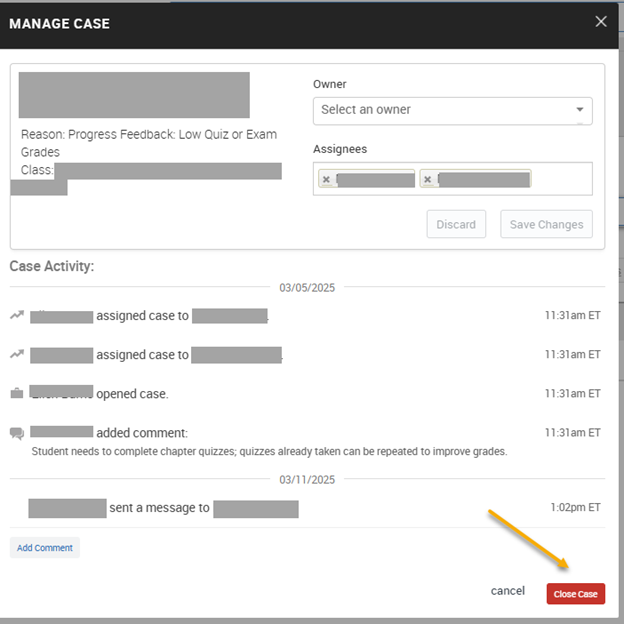
You can add additional comments to the case. Select users can also close the case, provide the outcome and add comments.
View & Update Progress Report Feedback
View & Update Progress Report Feedback
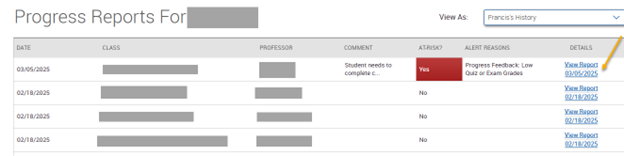
To view progress report feedback for an individual student, go back to the student’s page and, under “Staff Alerts,” click on “Progress Reports.”
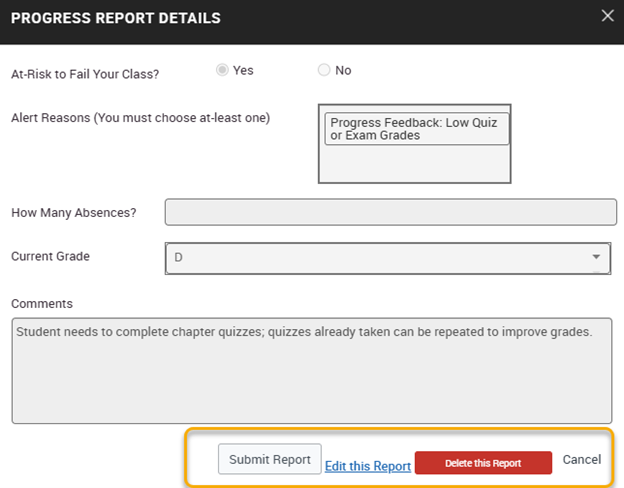
This will take you to the student’s Progress Report section. You can view an individual progress report by clicking “View Report.”
Once the report is open, you’ll be able to resubmit, edit or delete the report.
Run an Advanced Search
Run an Advanced Search
Note: To search for a single student, please review the View a Student Record section for instructions.
EAB’s search functionality allows you to search for students with various attributes or input an external list of students. Advanced search is accessed by clicking the magnifying glass on the left side of the screen.
To input an external list of students for bulk actions, copy and paste multiple IDs or email addresses. Use a space to separate student ID numbers or email addresses. Results are limited to 300 students.
For example, "0012345678 0087654321 0023456789 0098765432" or "[email protected] [email protected] [email protected]" could be used in the search.
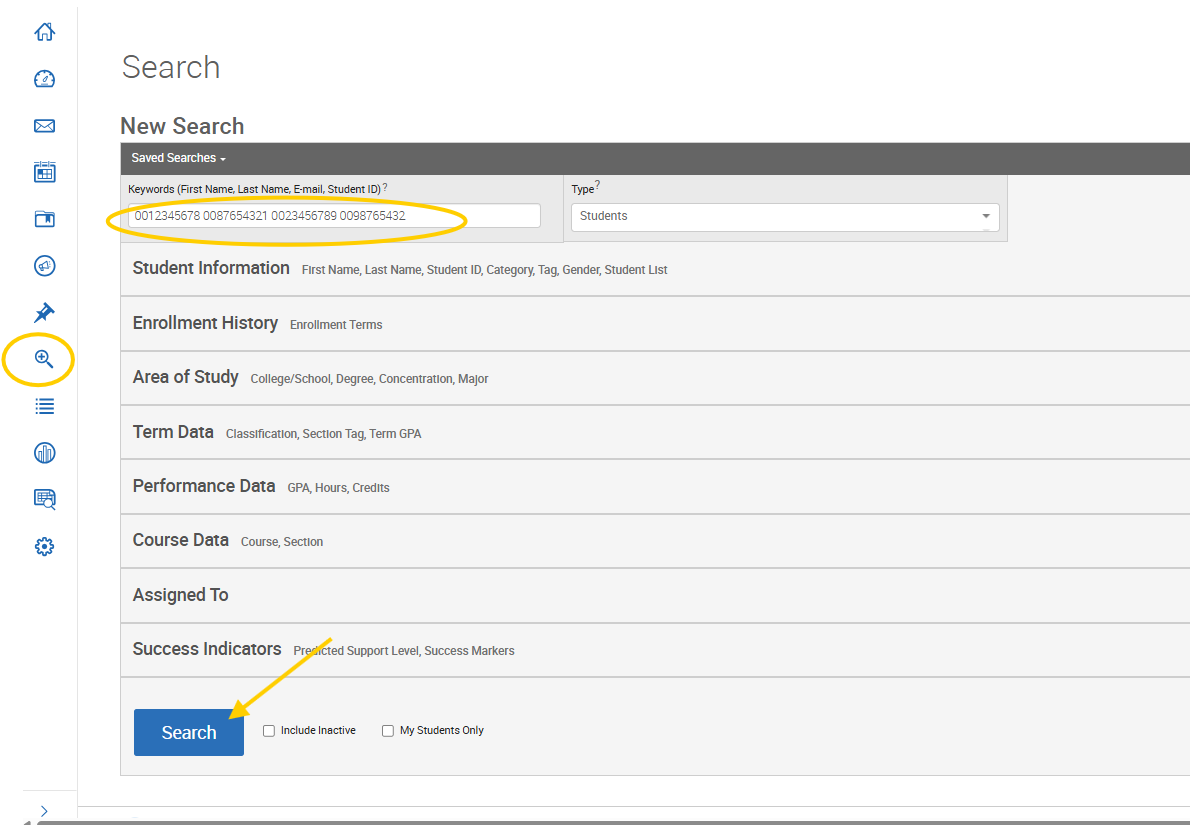
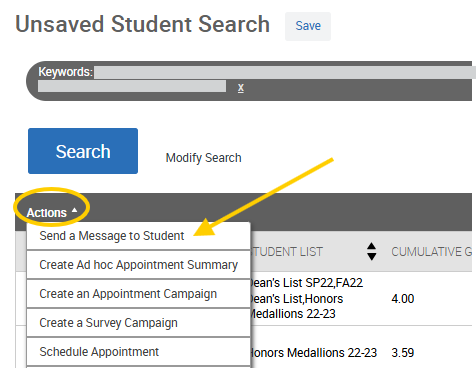
When a search brings back students, you can take further action (such as sending an email and/or text) by checking off the box for all or some of the students and then clicking “Actions.”
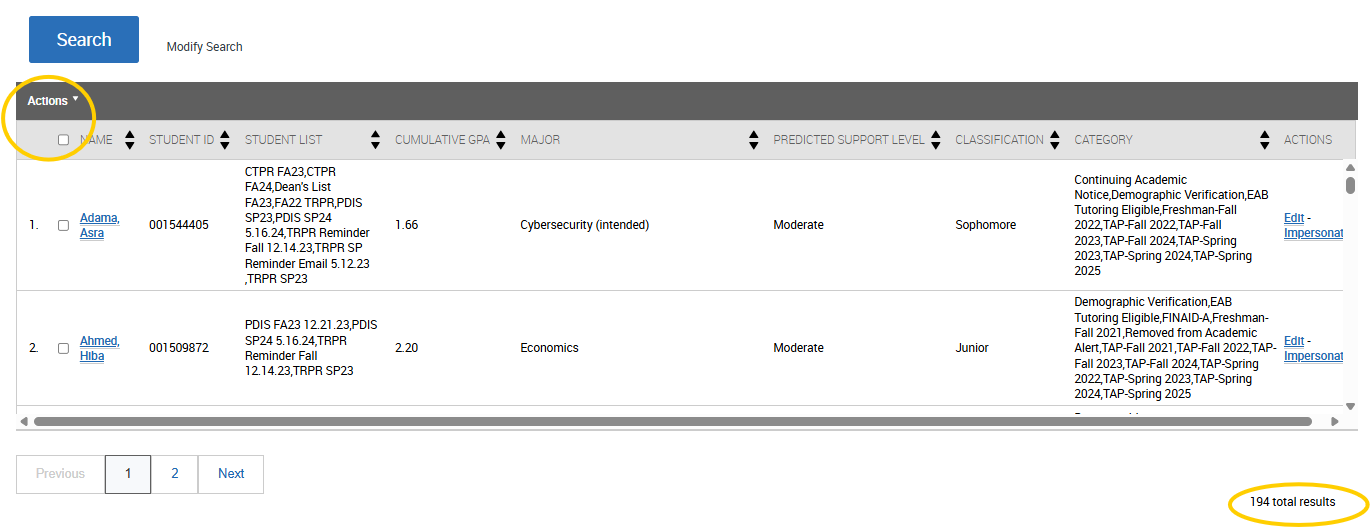
Note: If there are more than 100 students, you will need to click “Select all [Number] items” to include all students.

In the search section, you can also search by various factors. Click on a factor to expand it and see all available options.
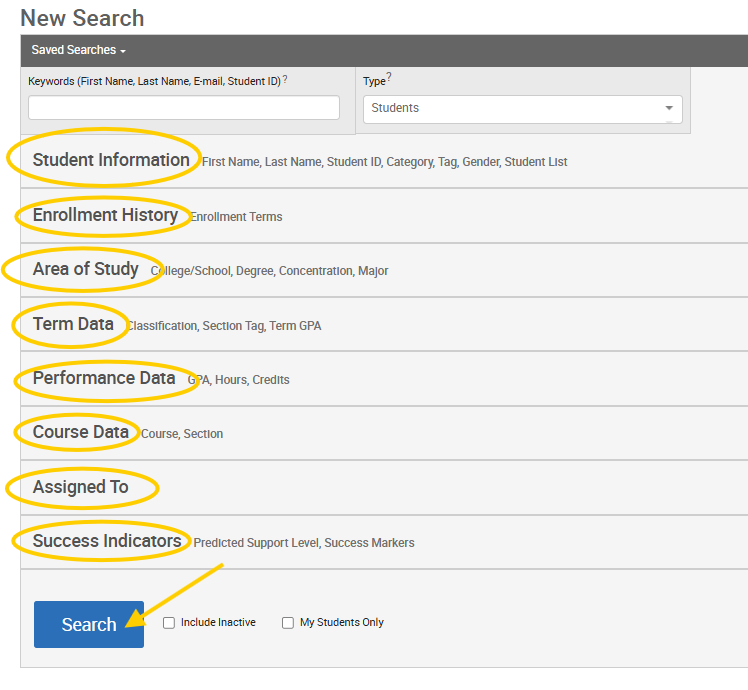
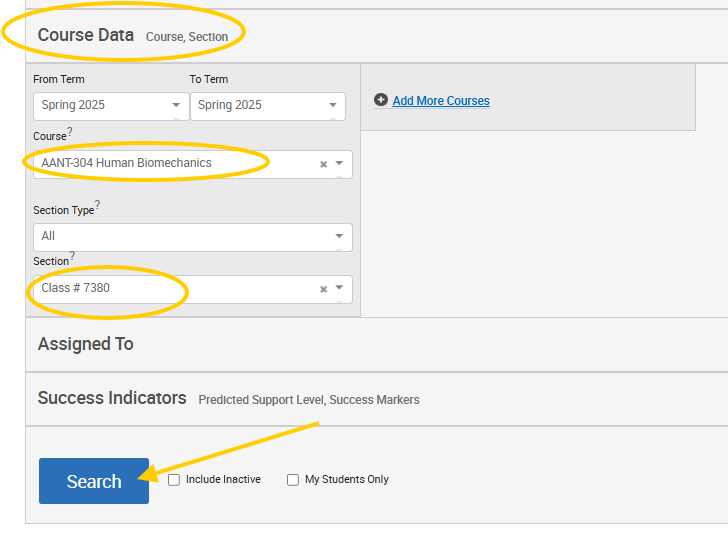
For example, you may want to search for students in a particular class and use the “Actions” feature to email or text all the students in that class.
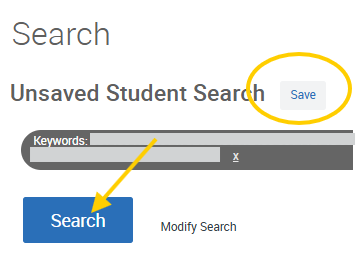
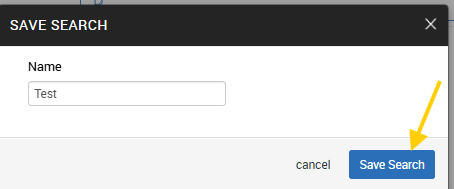
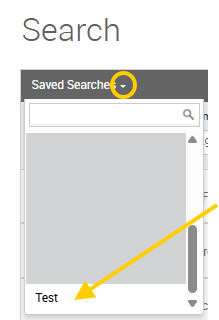
You can also “save” a search for easy accessibility.
Communicate with Students
Communicating with students in EAB Navigate is great because any faculty or staff member can access the information later via the student’s record, on the “History” tab under “Conversations.” You can also easily send an email and/or text message to a group of students.
Note:
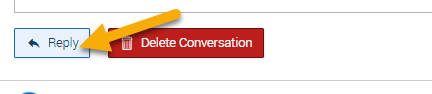
- When a student replies to the email, the message will go to your Outlook account. You can reply either via email or directly in EAB Navigate.
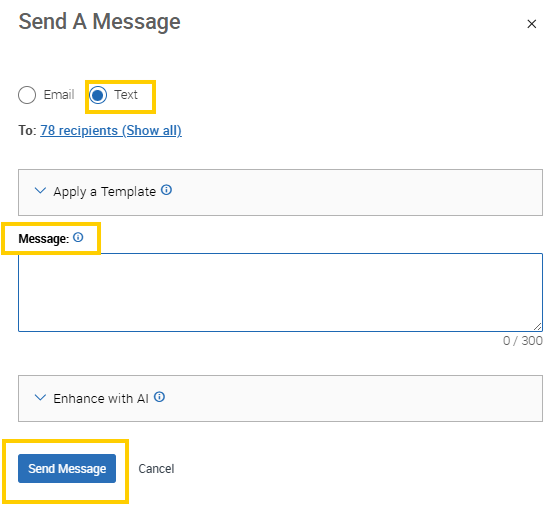
- There is a 300-character limit for texts, and you must reply within EAB Navigate, not your cell phone. Students cannot see who specifically a text is coming from, so please use identifying information.
communicate
Communicate with a Single Student
Communicate with a Single Student
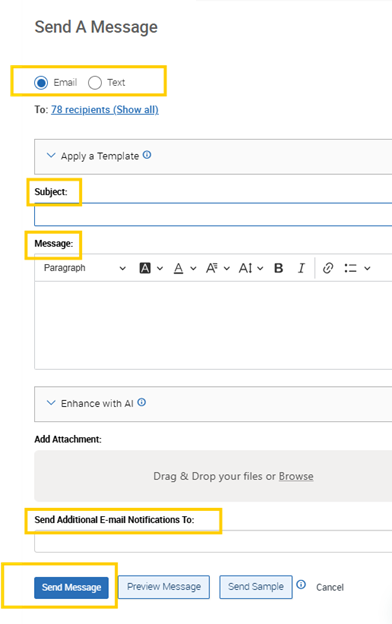
On the student’s profile, click on “Message Student” on the right side. You can send an email or a text message.


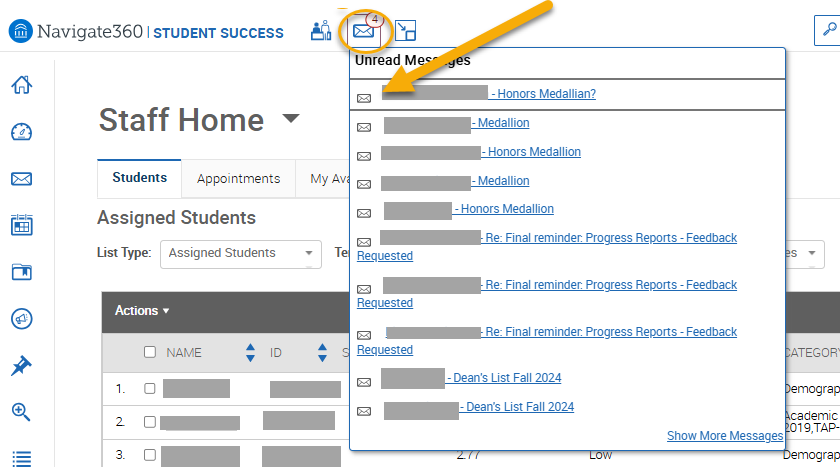
You can respond to emails or text messages from the student in EAB Navigate by clicking on the envelope on the top and then clicking on the message. You can respond by email or text.

Communicate with a Group of Students
Communicate with a Group of Students
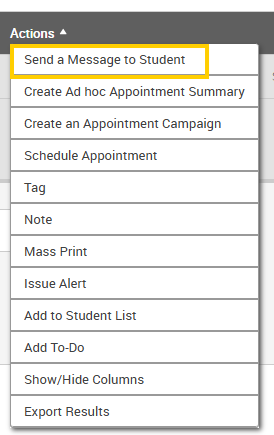
You can send emails or texts to one or more students from Staff Home, the student record or Advanced Search. Most “Action” menus throughout the platform also allow for sending emails or texts.
Once you click on a group of students from the Advanced Search or another “Action” menu (such as “Students in my Courses”), click on “Actions” and “Send a Message to Student.” The option will show at the top to choose an email or a text (similar to how you would for an individual student) and CC anyone else.
Manage In-term Progress Reporting
About five weeks into the semester, the Office of Undergraduate Education initiates in-semester progress reporting for student performance.
Instructors will receive a customized link via email that will direct them to log into EAB Navigate and report students at-risk for failing. These reports serve to provide timely academic support for any student identified as at-risk for failing a course.
EAB Navigate is University-sanctioned and generated from a FERPA-compliant University platform. Your assistance in UAlbany's efforts to assure continuity and collaboration is critical to supporting our students and achieving our goals for student academic success.
For instructions on how to view an existing progress report or alert, please review the Manage Alerts, Cases & Progress Reports section.
progress-reports
What to Know Before You Receive the Request
What to Know Before You Receive the Request
- Progress Report Workflow: A professor receives the progress report request via email and submits the progress report. If a case is created in EAB Navigate, the student’s advisor receives an alert about the progress report and reaches out to the student. After the advisor closes the case, the professor receives an email with the resolution for the case. Otherwise, the student receives an email with a copy of the progress report.

- Large courses: While we anticipate that these reports will be minimally time-consuming, we understand that this may be challenging for larger courses. If it is not possible to respond out on all students on the list, we ask that you please focus on those students you would identify as at-risk in your course and note that in the report.
- Multiple instructors: If there are multiple instructors listed for a course, or the course has a discussion section or lab as a co-graded component, the primary instructor of the course should determine who will submit the progress report for the student. Only one reply is needed per student per course.
- Students not on the roster: If you have a student who is not on the roster, please notify the Registrar's Office immediately.
- Entering feedback and idle time: For security purposes, the entry page is only active for a two-hour window of time. Leaving the feedback browser tab idling or inactive for longer than the two-hour time frame may cause data loss. We recommend saving frequently.
- Students included in feedback: Students receive alerts for progress reports so they can see the feedback directly. Advisors will still reach out to connect with students for support.
- Updates on follow up: You will receive auto-generated emails about these progress reports once the advisor has met with the student. These emails are informational only and you do not need to take any action. You are welcome to review those Alert/Case reports and provide feedback as "Comments" directly through EAB, if you would like.
- Extensions: We understand that each course is structured differently, and faculty may not have completed assessments yet. If you need an extension for reporting, please contact Natalie Coffey at [email protected].
How to Fulfill a Progress Report Request
How to Fulfill a Progress Report Request
Step 1: Click the Link
- The request email is entitled, “Progress Reports - Student Feedback Requested.”
- There will be a link at the bottom of the email entitled, “Click to Begin Entering Student Feedback.” Click that link.
- There will also be an expiration date by which you should submit all of your feedback.
- The link is unique to your courses, and you should only share it with people authorized to submit grading reports on your behalf.
Step 2: Enter Feedback
- On the entry page, there are rosters of the selected students separated by course number.
- For each student, please select “Yes” or “No” to identify if a student is “At-Risk to Fail Your Class.”
- If you select “Yes,” this means the student is "At-risk to Fail Your Class” and you will be prompted to choose a reason. Please choose "Progress Feedback" from the available Alert Reasons.
- Please only choose an Alert Reason for students who are "At-risk to Fail Your Class.” Choosing an Alert Reason initiates an alert, which requires follow up from the advisor.
- Please continue to fill out as many fields as possible.
- If you would like to save your work and come back to it, please click the blue “Submit only marked students (but I’m not done)” button at the bottom of the page.
Step 3: Submit Feedback
- When you are done entering feedback, please click the blue “Submit all unmarked students as not At-Risk (I’m all done)” button at the bottom of the page.
- When you submit your feedback, the screen will show a message saying you’ve successfully completed your feedback.
Submit a Progress Report Outside of the In-term Progress Reporting Cycle
Submit a Progress Report Outside of the In-term Progress Reporting Cycle
You may submit a progress report on any of your students at any time you like, outside the timeframe of in-term progress reporting.
- Log into EAB Navigate.
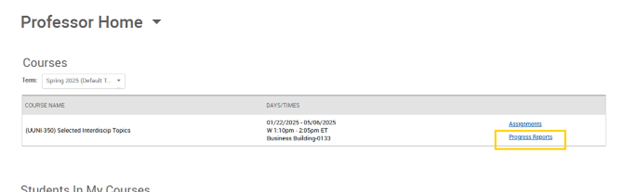
- Select “Professor Home,” instead of “Staff Home,” at the top of the page.
- For the course in question, click on “Progress Reports” on the right side of the page.
- On the roster, check the box next to the student’s name, then click "Create A New Progress Report" from the “Actions” dropdown.
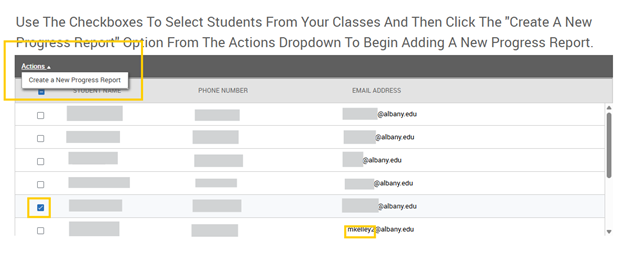
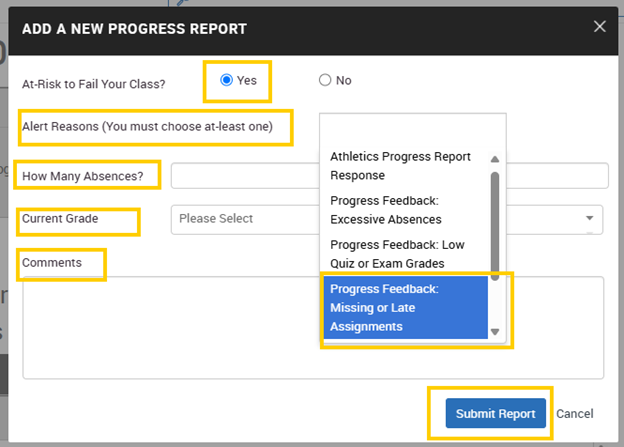
You can mark the student as At-Risk or not, choose a reason for the alert (can be more than one), list how many absences and the current grade, and any additional comments. This will then send an alert for the advisor to follow up with the student.
View Student Data with Dashboards
Select users have access to explore data through “Dashboards.” To access this data, click on the graph icon on the left side of the screen.
dashboards
Population Health Dashboard
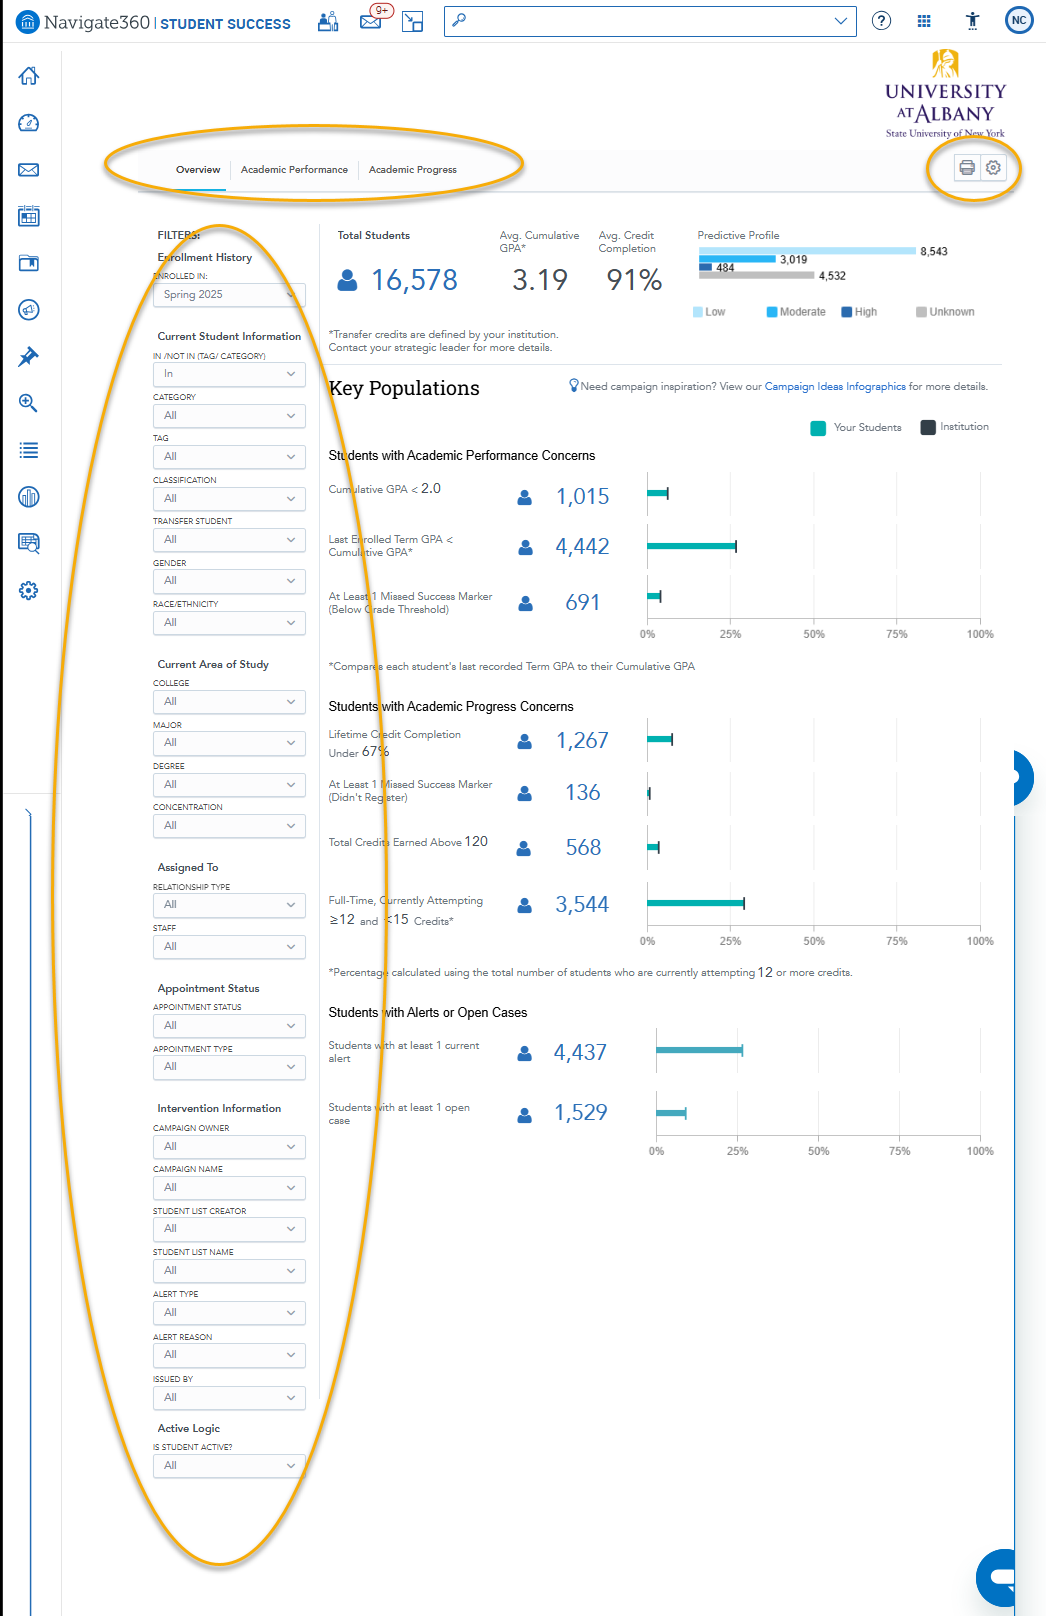
Population Health Dashboard
The “Population Health” Dashboard will allow you to access data for select student populations. These are interactive dashboards where you can filter down information and download reports.

Managing EAB Navigate Kiosks
EAB Navigate Kiosks are located at various locations around campus. Most offices that offer appointments for students — such as Financial Aid & Student Accounts, Academic Advising and the Learning Commons — have a kiosk.
Students can use EAB Navigate Kiosks to check in for existing appointments and make new appointments. Employees who work in locations with a kiosk should use these instructions to start up a kiosk and enable it for student use.
kiosks
Start up a EAB Navigate Kiosk
Start up a EAB Navigate Kiosk
- On the kiosk screen, click the home button on the Chrome browser to navigate to the EAB Navigate sign-in page.
- Sign into EAB Navigate using the username and password saved to the kiosk’s browser. Note: If you need assistance with the kiosk’s account information, please email [email protected].
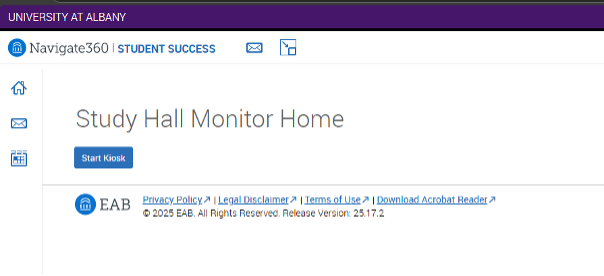
- Once you’ve signed in, click the “Start Kiosk” button.
- Select the kiosk’s location from the list of available locations.
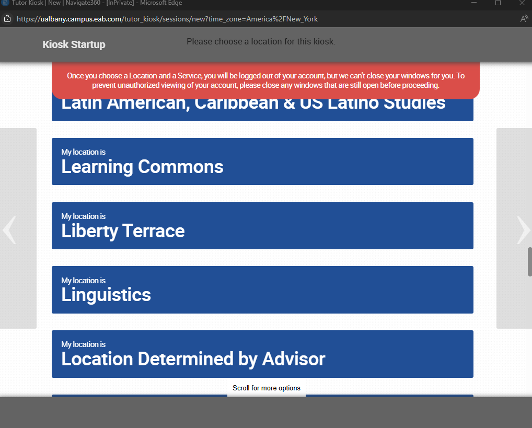
- Select “All Available Services.”
The kiosk should now display a swipe prompt for students, which will allow them to sign in and use the kiosk. You can test the student login by using this Test Student ID: 0000.
When a student swipes into the kiosk, they will be able to select from a menu of services. Only services with availability, or services configured for “Record Visit” or “Track Time,” will display. UUNI 90 is configured as “Record Visit.”