Class Permissions

This information is intended for academic schedulers. Instructors should review the Permission Numbers page.

What are Class Permissions? 

Academic departments can generate and issue two types of permissions:

  • General Permissions grant permission using a randomly generated number (meaning anyone with the number can use it to register for the class section). If a student uses a General Permission Number (CPN) and later drops the class, they cannot use the same permission number again. A permission number may be used until the permission expires or until the last day to add a class with permission, as indicated on the Academic Calendar.
  • Student Specific Permissions grant permission to individual students using their ID numbers, without generating an actual permission number. If a student uses a Student Specific Permission and then drops, they can use the permission again. Permission issued to a student may be used until the permission expires or until the last day to add a class with permission, as indicated on the Academic Calendar. It is very important that the academic department considers setting an expiration date. Student Specific Permission cannot be removed once the status on the permission changes to "used" or "used then dropped".

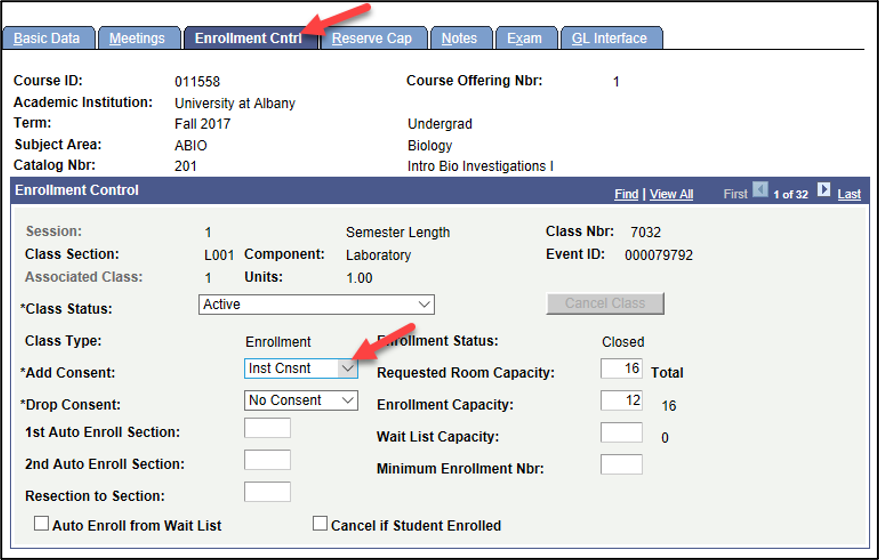
What class permissions will and will not allow depends on the class's location:
 

Permissions for classes located in a physical UAlbany classroom

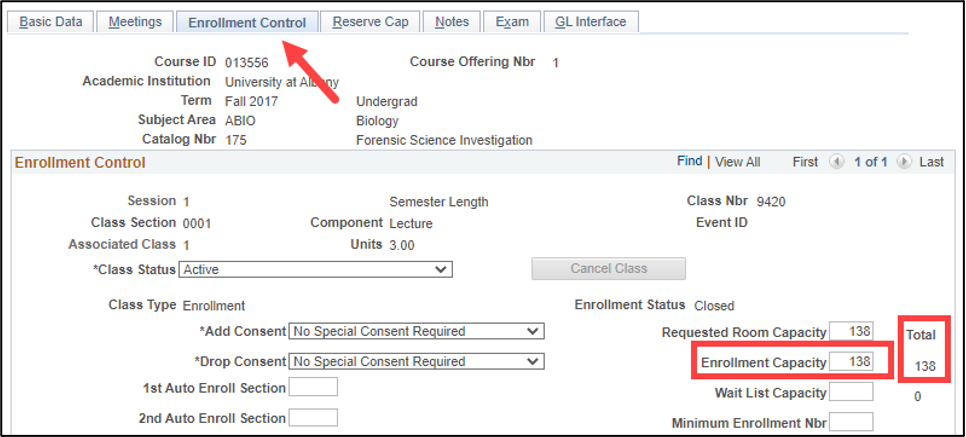
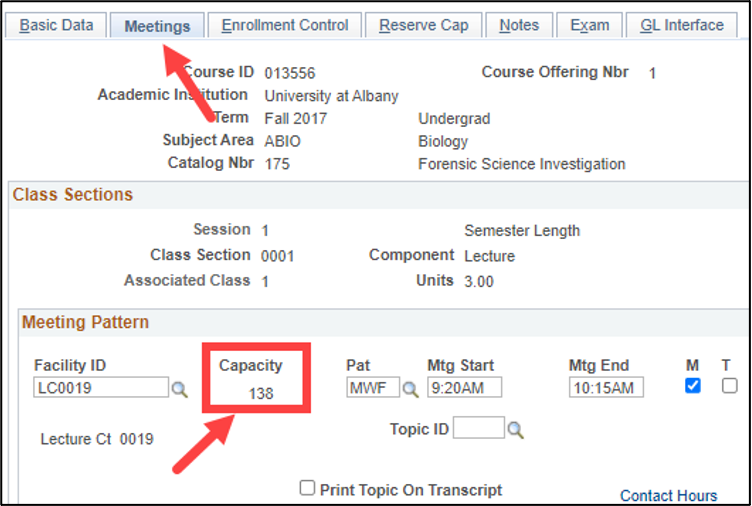
Permissions for classes located in a physical UAlbany classroom (Facility ID) will allow an override of the enrollment capacity of the class if the number of students enrolled is lower than the assigned classroom’s capacity. 

If the number of students enrolled is lower than the room capacity, permissions will also allow an override of a requirement group at the catalog level and/or section level, as well as an override of a reserved seat in a class. 

Permissions will not allow additional enrollment in a class if the room capacity has already been met.

However, there are some use cases where permissions will act differently than described above. This is especially true in the following circumstances:

  • Lecture classes with an associated discussion or lab: Before assigning permissions in these sections, departments must be certain the number of students enrolled in all associated discussion or lab sections will not exceed the room capacity of the associated lecture section. 

  • Combined classes (cross-listed, shared resource and same time/place): Before assigning permissions in these sections, departments must be certain the number of students enrolled in all sections that are combined will not exceed the assigned classroom’s capacity. 

Permissions for classes that are arranged, fully online or held off campus

Permissions for classes that are arranged, fully online or held off campus will allow an override of the following: 

  • the enrollment capacity  

  • a requirement group at the catalog level 

  • a requirement group at the section level 

  • a reserved seat in a class 

Here are some other important items to remember:

  • A class section can have only one type of permission (General Permission or Student Specific Permission), not both.
  • Permission can only be assigned to enrollment sections. 
  • An enrollment requirement group can check for requisites during registration instead of using class permission to regulate enrollment. 
  • Requiring permission to enroll in a class or setting a class to require instructor or department consent will override reserves and enrollment requirement groups, negatively affecting reserve enrollment totals. 
  • The type of permission enabled on a class will roll from like-term to like-term. For example, if Student Specific Permission was enabled for a class in Fall 2021, when that class is rolled to Fall 2022, Student Specific Permission will stay enabled. 


Instructions for Managing Class Permissions

Identify the Enrollment Capacity & Total Number of Students Enrolled in a Class
  1. Log into PeopleSoft. Use the Main Menu to navigate to “Maintain Schedule of Classes." (Your pat will be "Curriculum Management,” then “Schedule of Classes” and finally “Maintain Schedule of Classes.") 
     

  2. Enter the Term, Subject Area, Catalog Number and select Search.
     

  3. Select the Enrollment Control Tab and view the Enrollment Capacity and Total enrolled. 
     

A screenshot of the PeopleSoft page, showing how to identify the enrollment capacity and total number of students enrolled in a class.
Identify Classroom Capacities
  1. Log into PeopleSoft. Use the Main Menu to navigate to “Maintain Schedule of Classes." (Your pat will be "Curriculum Management,” then “Schedule of Classes” and finally “Maintain Schedule of Classes.") 
     

  2. Enter the Term, Subject Area, Catalog Number and select Search.   
     

  3. Select the Meetings Tab and view the Capacity.
     

A screenshot of the PeopleSoft page, showing how to identify classroom capacities.
Generate & Manage General Permissions

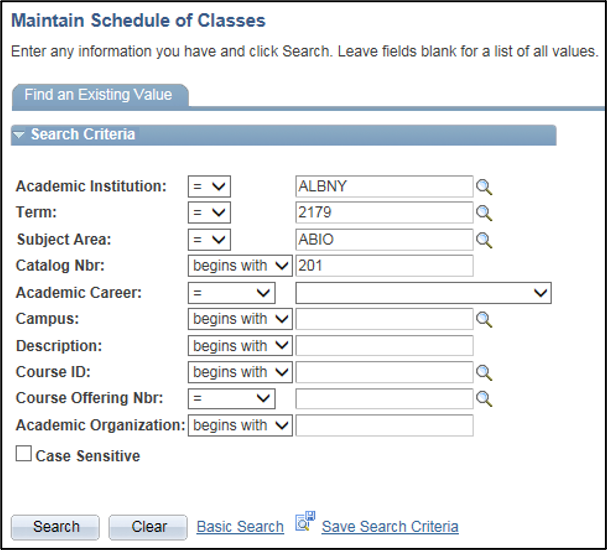
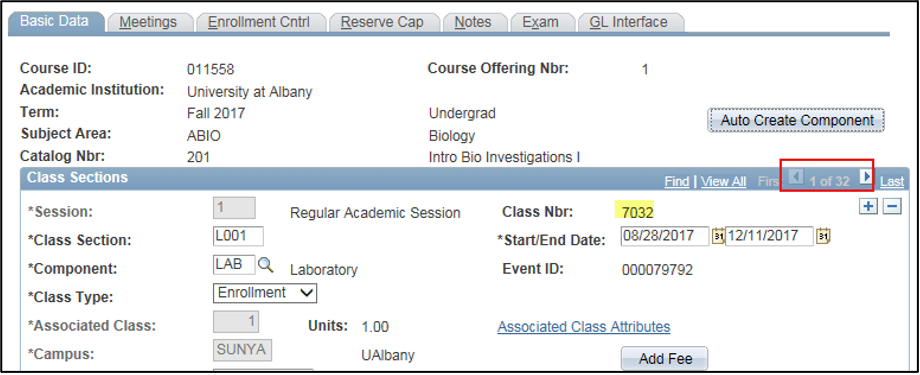
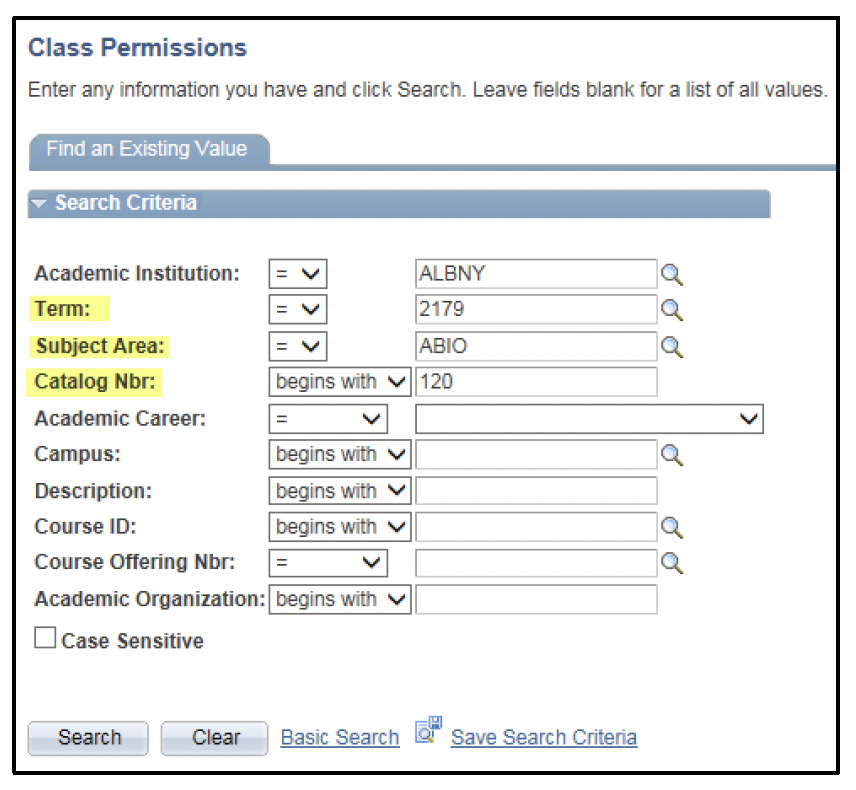
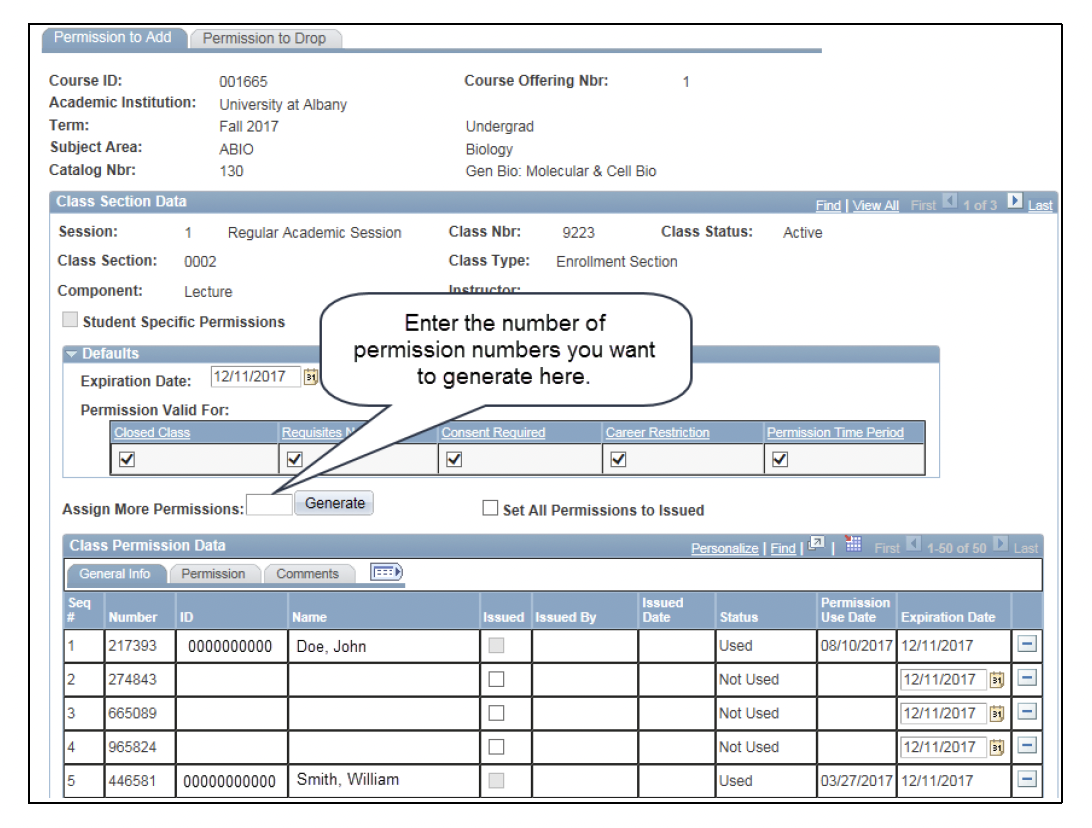
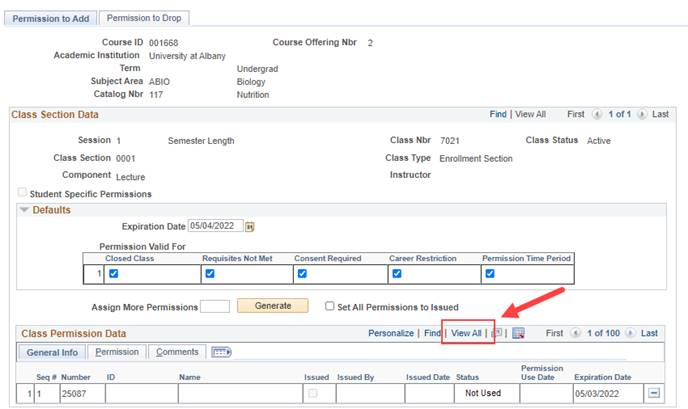
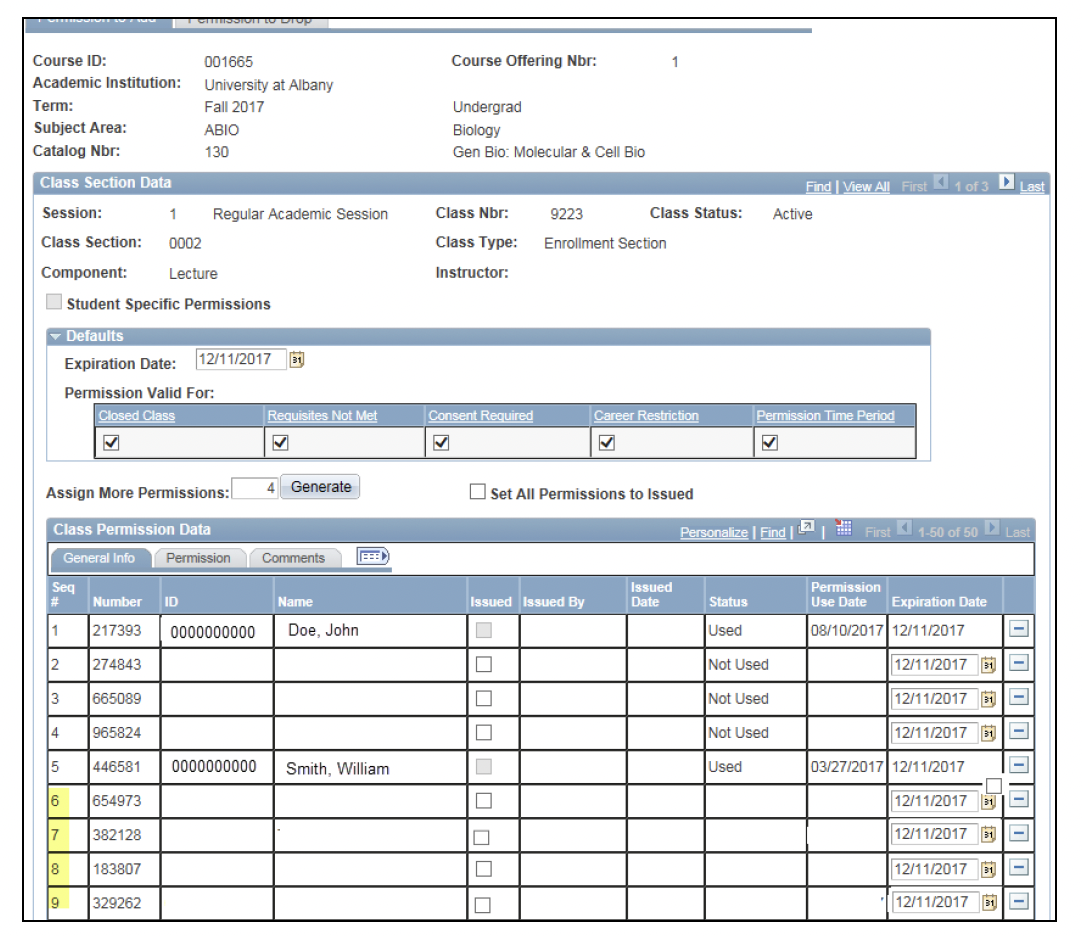
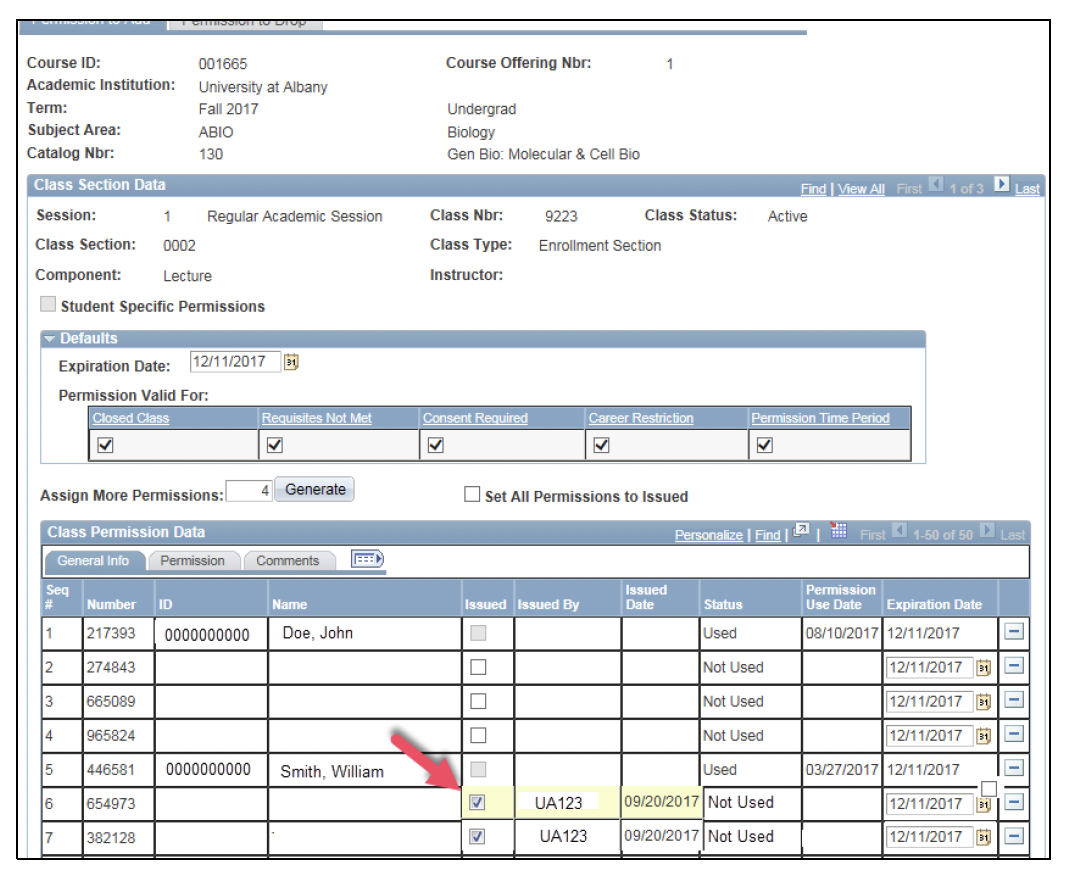
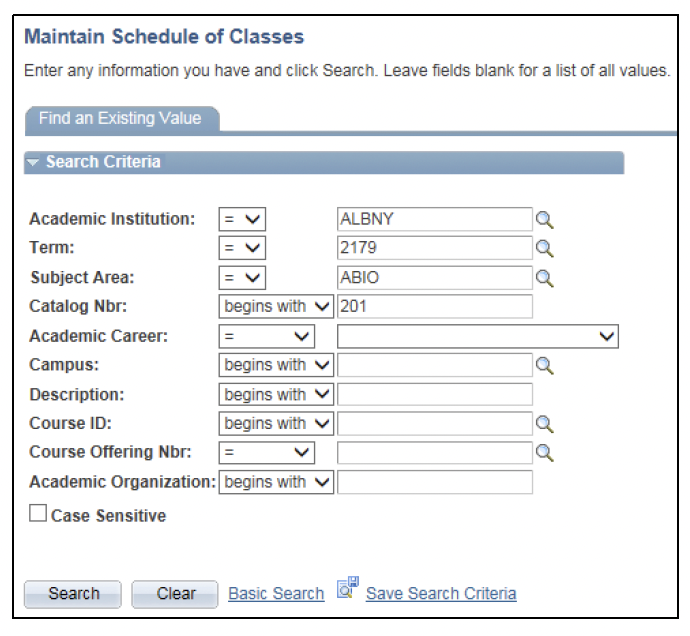
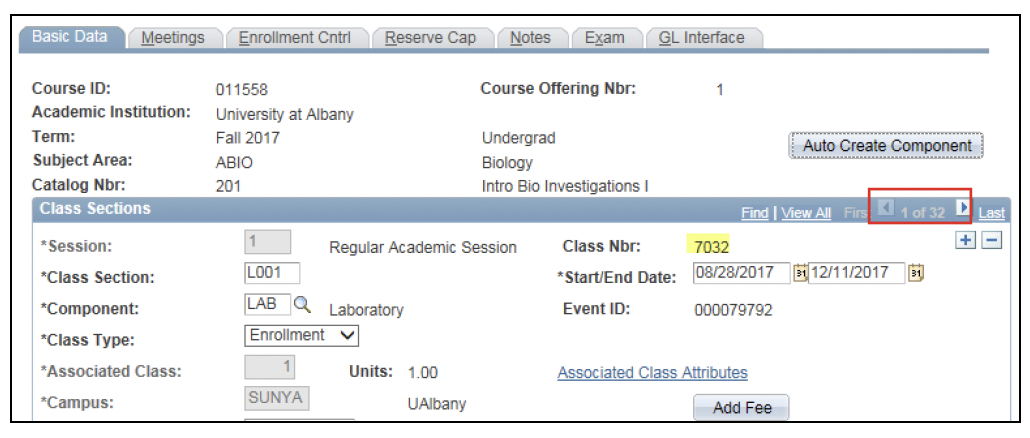
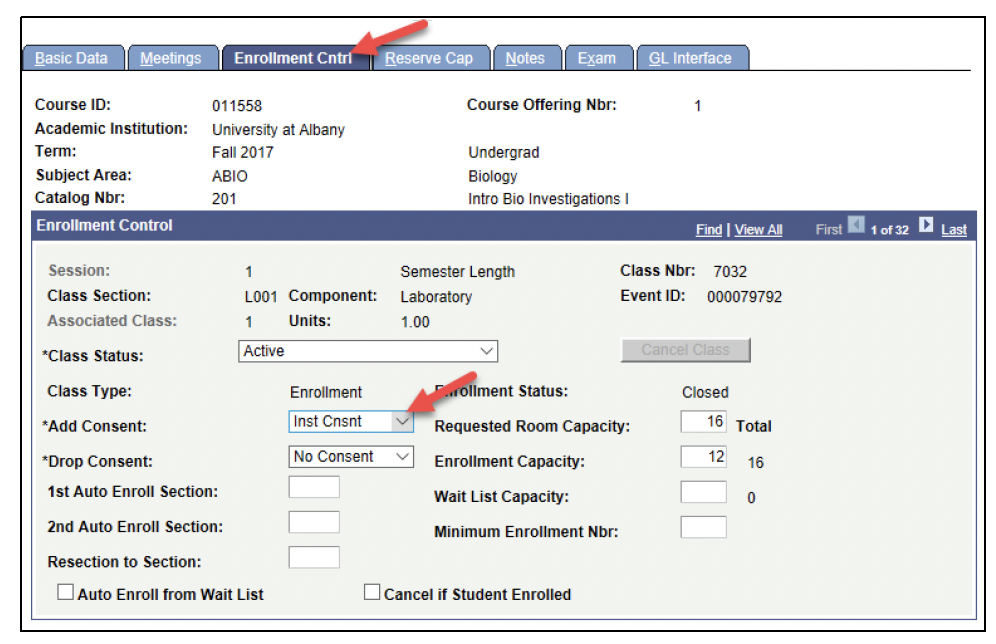
Follow these instructions to generate a general permission number: 

  1. Log into PeopleSoft. Then, use the main menu to navigate to “Maintain Schedule of Classes.” (Your path will be “Curriculum Management,” then “Schedule of Classes,” then “Maintain Schedule of Classes.”) 
     
  2. Use the “Term,” “Subject Area” and “Catalog Number” fields to search for the class. Then select “Search.” 
A screenshot of the PeopleSoft page, showing the actions described above in Step 2.
  1.   Use the scrolling arrows to navigate to the correct class number.
A screenshot of the PeopleSoft page, showing the actions described above in Step 3.
  1. If you intend to set the class to require permission to enroll, click the “Enrollment Cntrl” tab and verify that the class is set to Instructor or Department consent. If the class is not set to that consent, send a Section Correction Form to the Registrar’s Office to add this consent. 
A screenshot of the PeopleSoft page, showing the actions described above in Step 4.
  1. Navigate to the “Basic Data” tab and verify that the Student Specific Permissions checkbox is not checked for that section. If it is checked, send a Section Correction Form to the Registrar’s Office to change this type of permission before proceeding forward. Note: Classes default to use General Permission, so — unless you have used Student Specific Permission in a previous semester — it should already be set to use General Permission.
A screenshot of the PeopleSoft page, showing the actions described above in Step 5.
  1. Use the Main Menu to navigate to “Class Permissions.” (Your path will be “Records and Enrollment,” then “Term Processing,” then “Class Permissions and then finally “Class Permissions.”) 
     
  2. Use the “Term,” “Subject Area” and “Catalog Number” fields to search for the class. Then select “Search.” 
A screenshot of the PeopleSoft page, showing the actions described above in Step 7.
  1. Use the scrolling arrows to navigate to the correct class number. Note: You cannot assign permission numbers to a non-enrollment section. 
A screenshot of the PeopleSoft page, showing the actions described above in Step 8.
  1. In the “Assign More Permissions” field, enter the amount of permission numbers you need to generate. Then select “Generate.” 
A screenshot of the PeopleSoft page, showing the actions described above in Step 9.
  1. Select “Save.” Then, select “View all” to see all permission numbers (the default is to show only one row). If you have previously generated permission numbers for this course, the new numbers will show up under the old ones.
A screenshot of the PeopleSoft page, showing the actions described above in Step 10.


A screenshot of the PeopleSoft page, showing the actions described above in Step 10.


Please also be aware of the following information: 
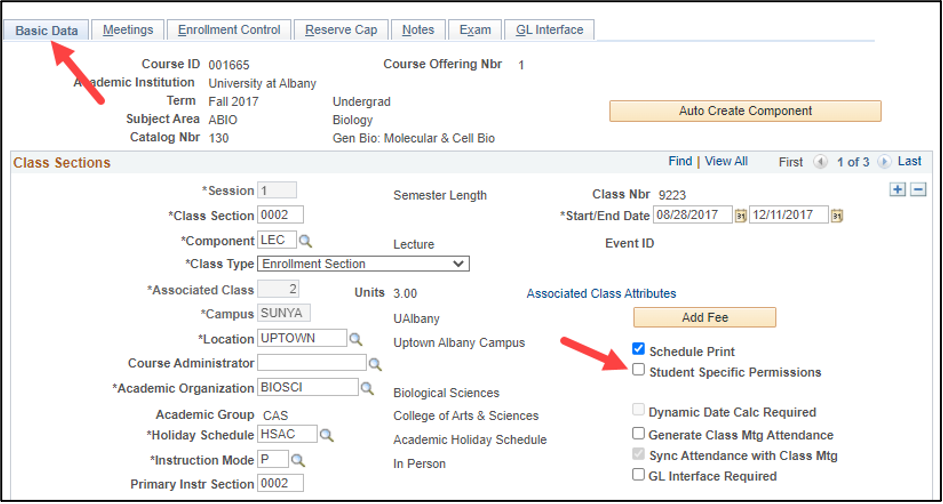
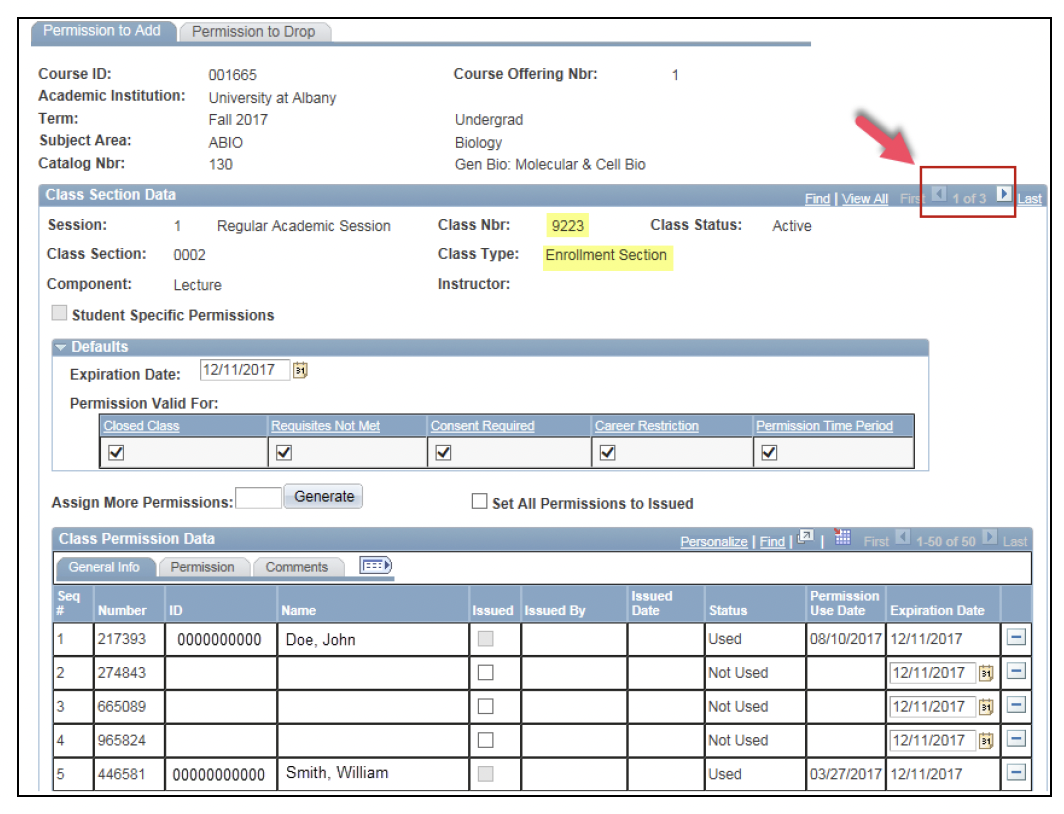
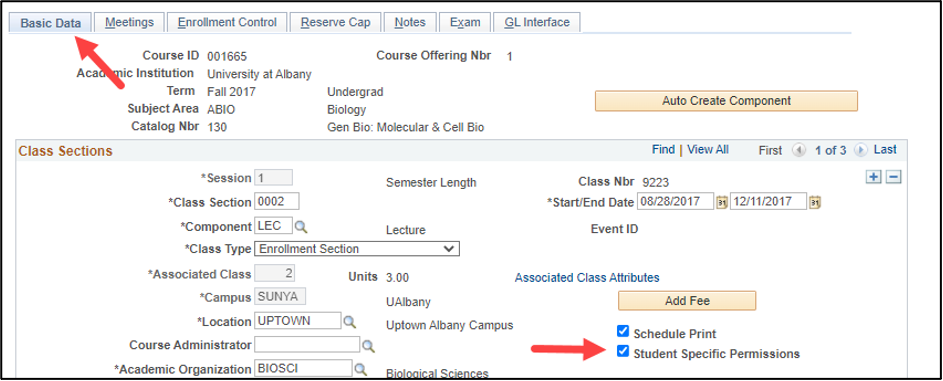
  • The permission numbers’ expiration date will default to the last day of the semester. You may change the expiration date, if necessary.
     
  • Permission numbers will allow students to register for a class until either the permission number expires or until the last day to add a class with a permission number, as indicated on the Academic Calendar
     
  • Once you give a permission number to a student, click the “issued” box next to that number. It will populate with your Net ID and the date, so your department knows you have provided the permission number to a student. 
A screenshot of the PeopleSoft page, showing the issued box actions described in the bullet above.
  • Once a student uses a permission number, its status will change from “Not Used” to “Used,” displaying the student’s ID number, name and the date they used the permission number. 
Generate & Manage Student Specific Permissions

Follow these instructions to generate a Student Specific Permission: 

  1. Log into PeopleSoft. Then, use the main menu to navigate to “Maintain Schedule of Classes.” (Your path will be “Curriculum Management,” then “Schedule of Classes,” then “Maintain Schedule of Classes.”) 
     
  2. Use the “Term,” “Subject Area” and “Catalog Number” fields to search for the class. Then select “Search.” 
A screenshot of the PeopleSoft page, showing the actions described above in Step 2.
  1. Use the scrolling arrows to navigate to the correct class number. 
A screenshot of the PeopleSoft page, showing the actions described above in Step 3.
  1. If you intend to set the class to require permission to enroll, click the “Enrollment Cntrl” tab and verify that the class is set to Instructor or Department consent. If the class is not set to that consent, send a Section Correction Form to the Registrar’s Office to add this consent.
A screenshot of the PeopleSoft page, showing the actions described above in Step 4.
  1. Navigate to the “Basic Data” tab and verify that the Student Specific Permissions checkbox is checked for that section. If it is not checked, send a Section Correction Form to the Registrar’s Office to change this type of permission before proceeding forward.
     
A screenshot of the PeopleSoft page, showing the actions described above in Step 5.
  1. Use the main menu to navigate to “Class Permissions.” (Your path will be “Records and Enrollment,” then “Term Processing,” then “Class Permissions” and finally "Class Permissions.) 
     
  2. Use the “Term,” “Subject Area” and “Catalog Number” fields to search for the class. Then select “Search.” 
A screenshot of the PeopleSoft page, showing the actions described above in Step 7.
  1. Use the scrolling arrows to navigate to the correct class number. Note: You cannot assign permission numbers to a non-enrollment section. 
A screenshot of the PeopleSoft page, showing the actions described above in Step 9.
  1. In the “Class Permission Data” field, enter the student’s ID number. (To add another student, select the plus icon to add a row.) 
A screenshot of the PeopleSoft page, showing the actions described above in Step 11.
  1. Select “Save.” 
     

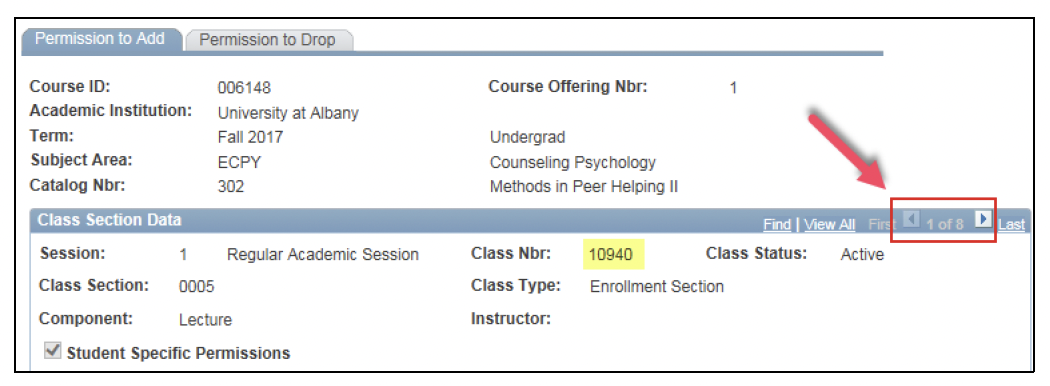
A permission number will not appear for Student Specific Permissions. Instead, the identified students’ ID numbers and names will appear on the permission number page, which means the identified students can now enroll in the class. 

The system will automatically allow the identified students to enroll in the class until either the permission expires or until the last day to add a class with permission, as indicated on the Academic Calendar. It is very important that the academic department considers setting an expiration date. Student Specific Permission cannot be removed once the status on the permission changes to "used" or "used then dropped".