Creating Toolboxes and Scripts
Start by
opening or creating a new map document in ArcMap
To create a
new Toolbox for your ArcPy scripts,
Click the Toolbox icon ![]()
When the Toolbox opens up, right-click ![]() �and select Add Toolbox�
�and select Add Toolbox�
To create a new toolbox, Click ![]() in
the upper right of the Add Toolbox dialog. A new entry shows up in the list
(e.g. Toolbox.tbx). Rename it to whatever you want (I
use MyToolbox.tbx) making sure to keep the .tbx extension.
in
the upper right of the Add Toolbox dialog. A new entry shows up in the list
(e.g. Toolbox.tbx). Rename it to whatever you want (I
use MyToolbox.tbx) making sure to keep the .tbx extension.
Select your new toolbox in the Add Toolbox dialog and click Open. Your toolbox now appears in the
list for the ArcToolbox window. I would advise you to
save your map document at this point so that your toolbox always shows up in
the ArcToolbox window every time you open it.
To add a
script to your toolbox,
Right-click your toolbox (e.g. MyToolbox)
in the ArcToolbox window and select Add�Script�
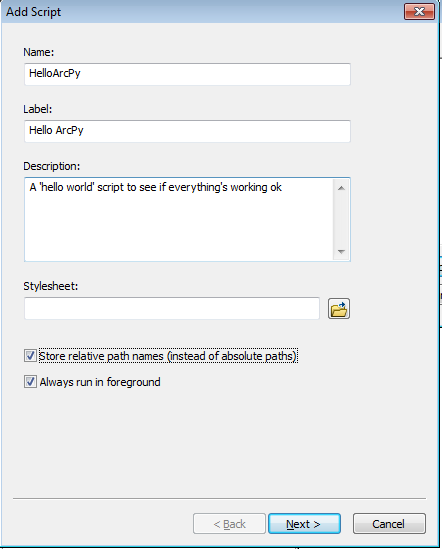
Fill in the fields in the Add Script dialog. For Name, add a descriptive name that has
no spaces or underscore characters in it (who knows why�) The
text in the Name field does not have to be identical to the name of your script
but for the sake of clarity it�s a good idea to keep them somewhat similar. For
Label, add a descriptive name that
will identify your script under your toolbox. Enter a Description of what the tool does (no restrictions on text in
here). Here�s how mine looks for a simple, �hello world� script:
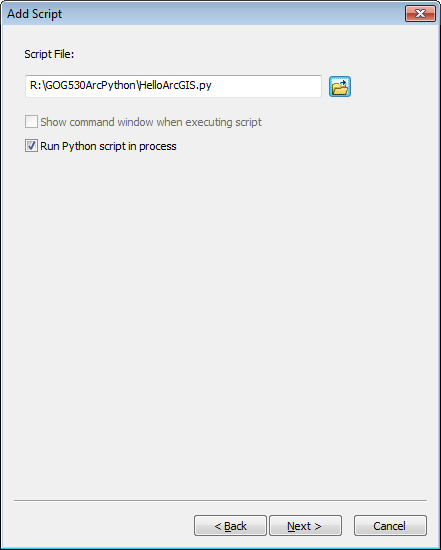
Click Next. Click
the browse button ![]() �and you will be prompted to enter the path for
a script file. You can enter the path to an existing file or you can create a
new empty file. Here I�ll give you instructions to create a new, empty script.
Navigate to a folder that has (or will have) script files in it. All ArcPy scripts have a .py
extension. To create a new file, just enter the desired file in the Script File
text field. Here�s mine:
�and you will be prompted to enter the path for
a script file. You can enter the path to an existing file or you can create a
new empty file. Here I�ll give you instructions to create a new, empty script.
Navigate to a folder that has (or will have) script files in it. All ArcPy scripts have a .py
extension. To create a new file, just enter the desired file in the Script File
text field. Here�s mine:

Click Open and the
path to your script will appear in the Add Script window:
Click Next. If you
entered the name of a new file, you will see this window:
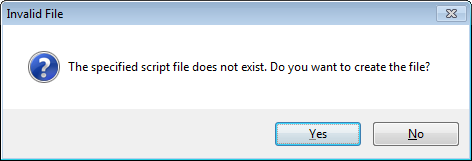
Click Yes. You
will be prompted to add parameters:
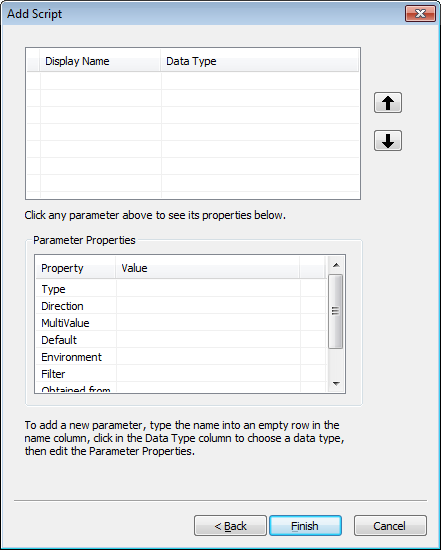
When executed, a script with parameters will launch an
interactive dialog box. Our new script will not have any parameters so just
click Finish. Your script will now
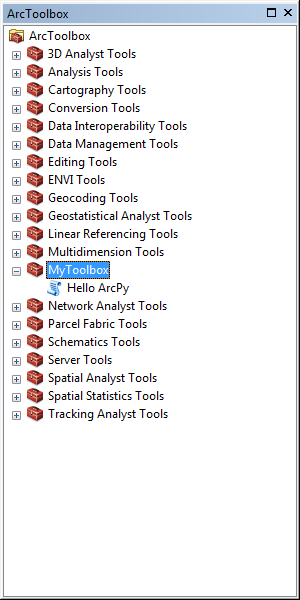
appear in the ArcToolbox window under your toolbox.
Here�s mine:
Adding content
to your script
Right now, our script is an empty text file. Right click your
script in ArcToolbox and select Edit� Your system text editor will pop up (usually a version of
Notepad on Windows). Please note: don�t edit in Word or
any other word processor! They use characters outside of the set that Python
recognizes�your code will not run!
In Notepad, add the following lines to your script:
import
arcpy������ #
the module that links to the ArcGIS universe of code
arcpy.AddMessage('hello out there!')� # prints an inspirational message to the
console
Save your file.
Back in ArcMap, double click your script in ArcToolbox. A window representing your script pops up.
Here�s mine:
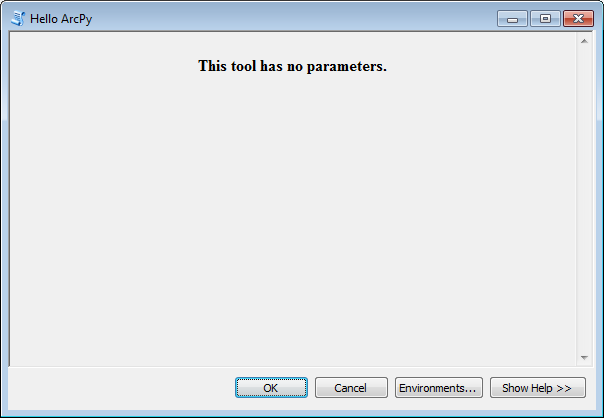
Click OK. Now a
console window pops up with your script�s output:
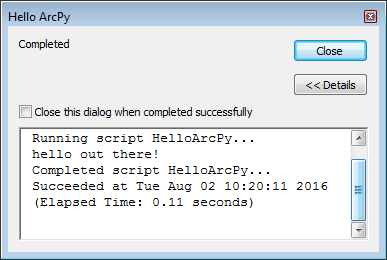
You can click Close
when you have finished admiring your work. Congratulations!
Be sure
to save your map document!
Things that
typically go wrong
Make sure your scripts end with a .py
extension
Case counts in Python! If you import ArcPy
instead of arcpy, you get this friendly message in
the console window:
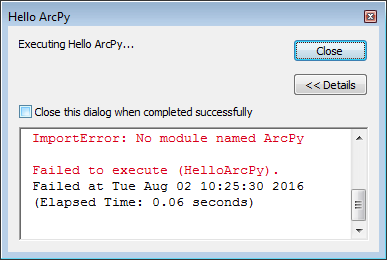
Failure!!! So dramatic!
Obviously, all kinds of things will go wrong but we�ll figure
out how to fix them. Don�t panic.
Something to
try on the ArcPy command line
Open the Python window by clicking ![]() on
the button bar
on
the button bar
Then enter this code:
>>> import
arcpy
>>> mxd = arcpy.mapping.MapDocument("CURRENT")
>>> mxd.author = "Rebop Kwaku Baah (or your name)"
Finally, select File�Map
Document Properties and look for your handiwork�