Setting up the Java Development Kit
and Eclipse on Your Own Computer
Please note: install the
Java JDK first, then install Eclipse
Installing the Java JDK
JDK stands
for Java Development Kit and contains all of the programming code you will need
to make your projects work. Do not install the JRE (Java runtime environment);
it won�t hurt anything but it doesn�t have the programming code you need.
Follow
this link to the Oracle Java JDK download page.
You will now
see a license agreement (the version number on 8/23/16 was 8u101. Any version
number higher than this is ok). You must click Accept License Agreement to continue.
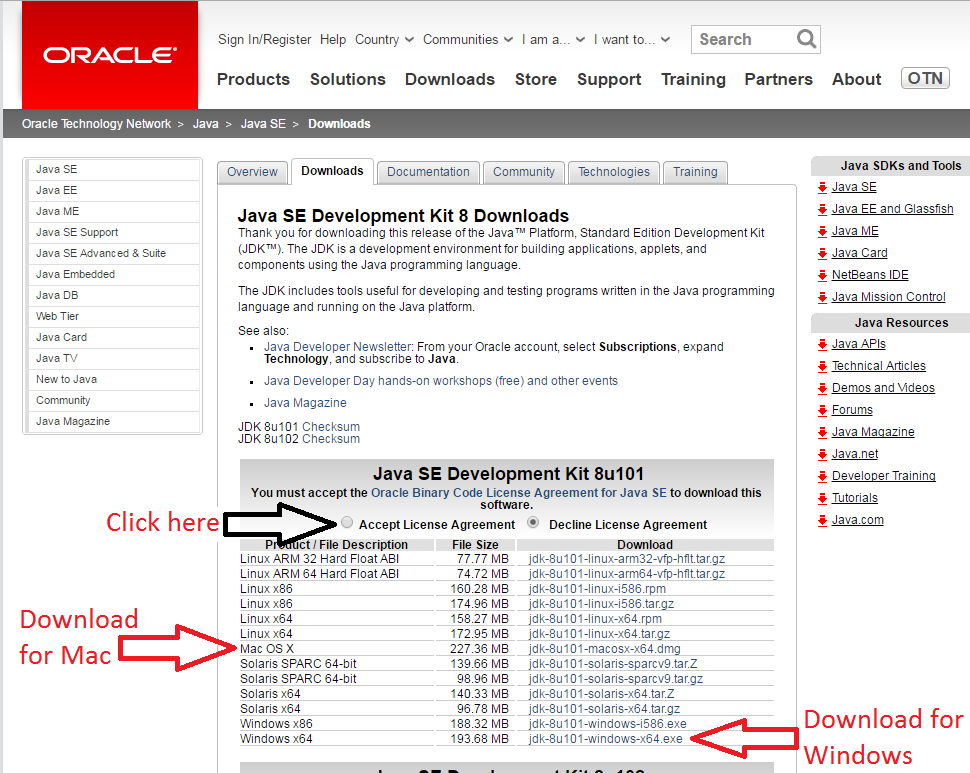
For PC users:
Select jdk-8u101-windows-x64.exe.
Run the .exe file you just downloaded and
install the default options (no need to change anything). When asked where to
install, accept the installer�s suggestion and click Next. It will do mysterious
things for a while.
Click Finish.
If asked,
you don�t have to register anything�you�re done with the JDK install.
For Mac users:
Once you
accept the license agreement, click jdk-8u101-macosx-x64.dmg to
install (look in your downloads folder). If asked, you
don�t have to register anything�you�re done with the JDK install.
Installing Eclipse
For PC and Mac users:
Download
the Eclipse IDE for Java Developers (Windows 64-bit). This is the Oxygen
version.
Run
the installer, pick the Eclipse IDE for Java Developers, and install.